
Forget buying these at the store… These circus animal cookies are way better when you make them at home! They are so delicious and bite-sized that they make the perfect treat for anyone, young and old!
You absolutely cannot beat a homemade cookie. Try out some more of my favorites that I refuse to buy at the store anymore. These are so much better! My favorites are these oatmeal cookies, these sugar cookies, and of course, these classic chocolate chip cookies.

Circus Animal Cookies
No more store-bought circus animal cookies for you! I am not kidding when I tell you that these have a similar flavor to the cookies that are so reminiscent of childhood BUT… They are so much better. They have a soft texture, and the white chocolate frosting is only on the top. The homemade frosting adds an extra touch because it’s so creamy and delicious. Much better than that coating is on the store-bought versions of these!
What’s extra great about this recipe is that you get four dozen cookies out of it! I’d say that’s a little bit more than you get out of the box at the store! These cookies make so many that you can make them for a baby shower, birthday party, or really just as a cute little after-school snack for the kids! My kiddos love to help me cut them out and decorate them, and they think the bite-sized versions are incredibly charming!
Ingredients You Need to Make Circus Animal Cookies
Lucky for you, these circus animal cookies are simple and easy, and the list of ingredients is too! Check out the recipe card at the bottom of the post for exact ingredient measurements.
Dough
- Flour: I used all-purpose flour to make these cookies.
- Baking Powder: This will help your cookies no be flat and chewy.
- Salt: The salt enhances all of the flavors of the other ingredients.
- Butter: I used unsalted butter that was out at room temperature.
- Granulated Sugar: You need sugar to make these cookies taste as delicious as they do!
- Lemon Zest: This adds a brightness to the cookie dough.
- Large Egg: Let your egg sit out at room temperature before you mix it in.
- Vanilla Extract: Add a splash of vanilla flavoring to your cookies!
White Chocolate Frosting
- White Chocolate Melting Wafers: These melt to have the smoothest finish!
- Shortening: This helps create a light and fluffy frosting.
- Clear Vanilla Extract: I use clear vanilla so that the white stays bright!
- Food Coloring: Pink food coloring is what makes these their classic color.
- Rainbow Nonpareils: These sprinkles are perfect to replicate what are in the original cookies.
Let’s Bake Circus Animal Cookies!
If you follow these instructions exactly, then before you know it, you will have the cutest and most delicious cookies ready and waiting for you to eat! Enjoy!
Prepare and Chill Dough
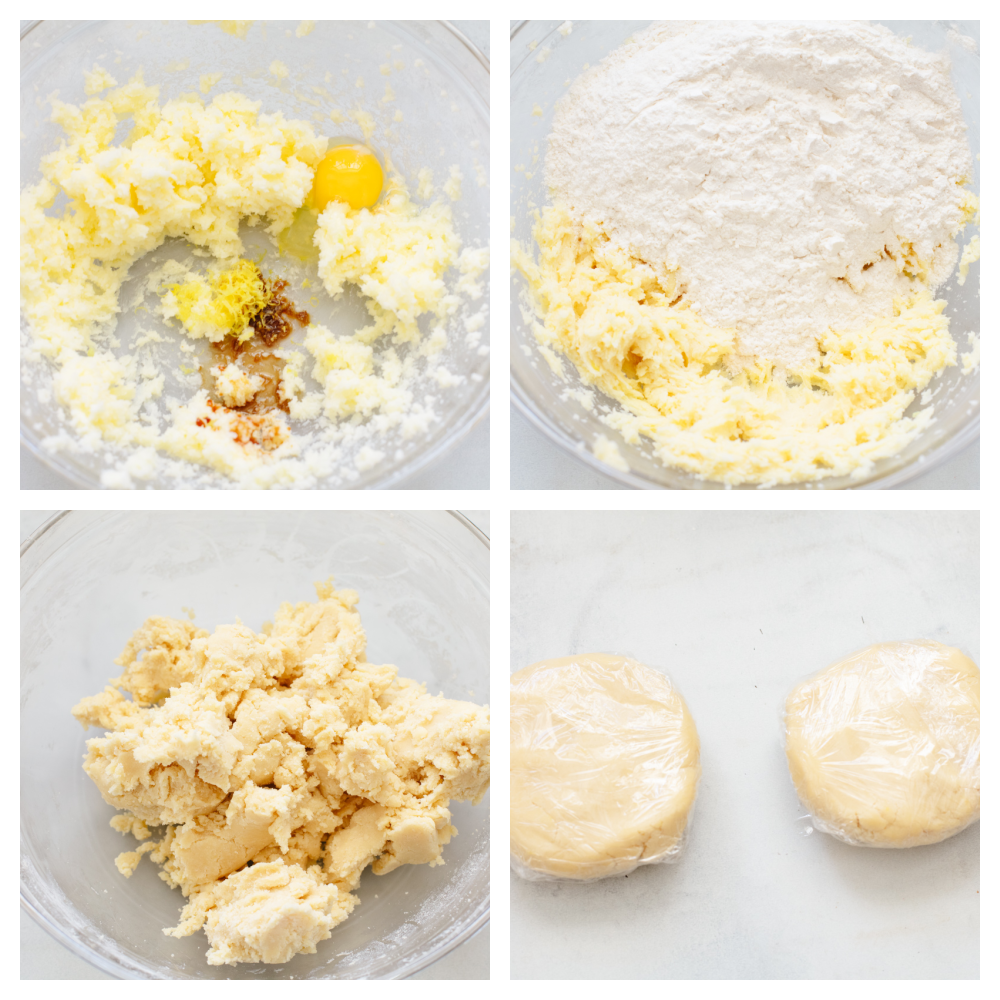
- Whisk: In a medium bowl whisk together the flour, baking powder, and salt. Set aside.
- Beat: In the bowl of a stand mixer use the paddle attachment or use a hand mixer to beat the butter and sugar together until fluffy and smooth, about 2 minutes. Add the lemon zest, egg, and vanilla and beat for another minute, until combined. Scrape down the sides and bottom of the bowl and mix until combined.
- Combine and Chill: Add the flour mixture to the butter and sugar mixture and mix on low until combined. Divide the dough into two equal portions. Wrap with plastic wrap and chill for 2 hours.
Roll and Bake
- Preheat Oven: Once chilled, preheat the oven to 350°.
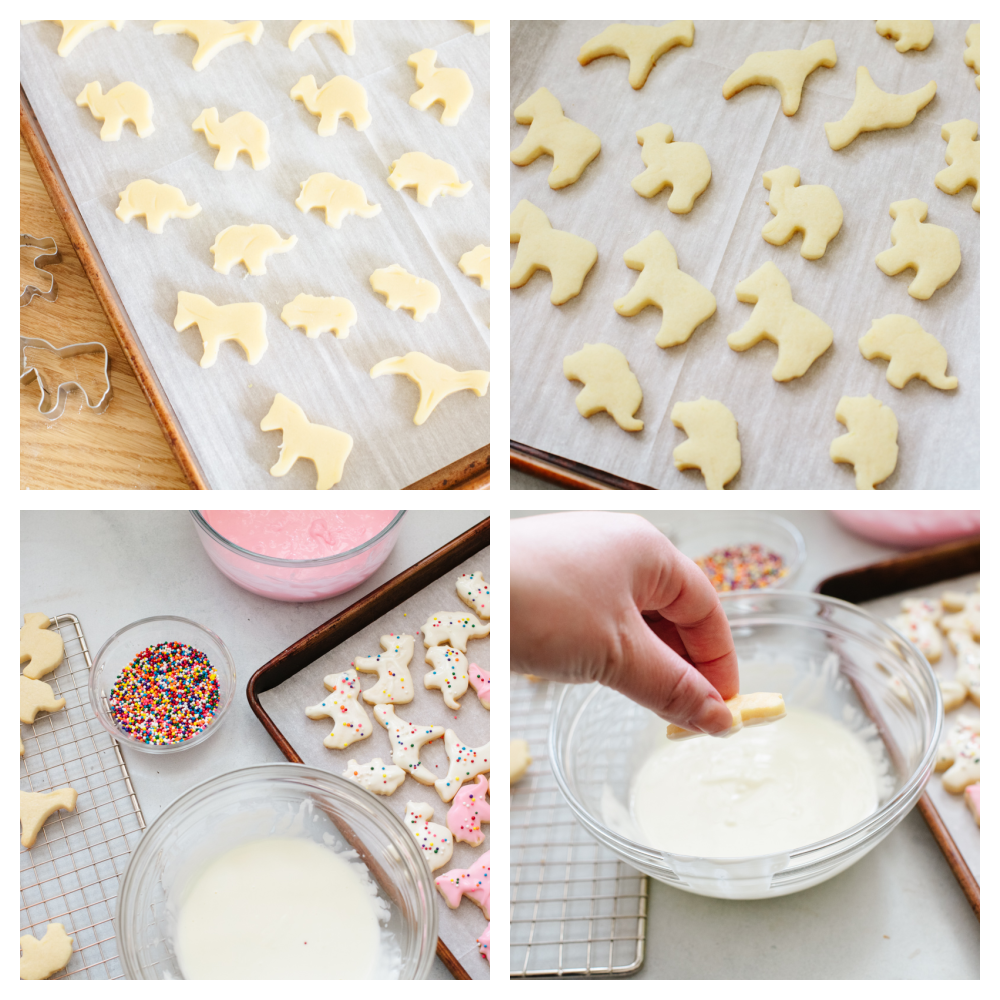
- Roll and Cut: Starting with half the dough, roll out on a lightly floured surface until it is ¼ inch thick. Cut until animal shapes using mini cooking cutters. If necessary, use a toothpick to poke the shapes out of the cookie cutters.
- Chill: Gather the dough scraps and press them together into a ball. Wrap in plastic wrap and chill while you roll out the other half of the dough. Repeat until all the dough has been used.
- Bake: Arrange the cookies on parchment-lined baking sheets, leaving at least 1 inch between them. Bake for 9-10 minutes, rotating halfway through. Let the cookies cool for 2-3 minutes on the baking sheet before transferring them to a cooling rack. Let the circus animal cookies cool completely before frosting.
- Make Frosting: In a medium microwave-safe bowl, add the chocolate wafers and shortening. Heat for 30 seconds, stir, and then 30 more seconds. Add the vanilla extract and whisk until smooth. Separate half into another bowl and set aside. Add one drop of pink food coloring to the first bowl and whisk until smooth.
- Dip: Carefully dip the tops of the cookies in the chocolate and sprinkle with nonpareils. The cookies can chill at room temperature, or be refrigerated to set faster.
Do You Have to Chill the Dough?
YES! Don’t skip this step! If you don’t take the time to chill the dough for the circus animal cookies, then the cookies will spread in the oven and they won’t hold their shape.

Cookie Baking Tips
There is nothing worse than baking cookies to have them turn out wrong. Follow these tips and these circus animal cookies will turn out just right!
- Room Temperature Ingredients: It’s important, for this circus animal cookie recipe, to use room temperature ingredients. This helps things mix together so that the dough and the frosting is smooth and doesn’t have any lumps.
- A Cooling Rack: It’s important to let your cookies cool on the baking sheet for a few minutes before you transfer them to the cooling rack. This allows the cookies to finish cooking on the hot baking sheet!
- Don’t Open the Oven: I know, I know, it’s tempting to open the oven to check on your cookies! But every time you do this, it lets the hot air out of the oven and it can alter the correct cooking time that they need. Use the oven light instead!

How to Store Leftover Cookies
These cookies can be stored in an airtight container on your counter. They will last 3-5 days! If you don’t eat them all up before then!

Homemade Circus Animal Cookies
Ingredients
Dough
- 2 ¼ Cup All-Purpose Flour
- ½ Teaspoon Baking Powder
- ¼ Teaspoon Salt
- ¾ Cup Unsalted Butter room temperature
- ¾ Cup Granulated Sugar
- 1 Teaspoon Lemon Zest
- 1 Large Egg room temperature
- 1 Teaspoon Vanilla Extract
White Chocolate Frosting
- 10 Ounces White Chocolate Melting Wafers
- 1 Tablespoon Shortening
- ¼ Teaspoon Clear Vanilla Extract
- Pink Gel Food Coloring
- Rainbow Nonpareils
Instructions
-
In a medium bowl whisk together the flour, baking powder, and salt. Set aside.
-
In the bowl of a stand mixer use the paddle attachment or use a hand mixer to beat the butter and sugar together until fluffy and smooth, about 2 minutes. Add the lemon zest, egg, and vanilla and beat for another minute, until combined. Scrape down the sides and bottom of the bowl and mix until combined.
-
Add the flour mixture to the butter and sugar mixture and mix on low until combined. Divide the dough into two equal portions. Wrap with plastic wrap and chill for 2 hours.
-
Once chilled, preheat the oven to 350°.
-
Starting with half the dough, roll out on a lightly floured surface until it is ¼ inch thick. Cut until animal shapes using mini cooking cutters. If necessary, use a toothpick to poke the shapes out of the cookie cutters.
-
Gather the dough scraps and press them together into a ball. Wrap in plastic wrap and chill while you roll out the other half of the dough. Repeat until all the dough has been used.
-
Arrange the cookies on parchment-lined baking sheets, leaving at least 1 inch between them. Bake for 9-10 minutes, rotating halfway through. Let the cookies cool for 2-3 minutes on the baking sheet before transferring them to a cooling rack. Let the cookies cool completely before frosting.
-
In a medium microwave-safe bowl, add the chocolate wafers and shortening. Heat for 30 seconds, stir, and then 30 more seconds. Add the vanilla extract and whisk until smooth. Separate half into another bowl and set aside. Add one drop of pink food coloring to the first bowl and whisk until smooth.
-
Carefully dip the tops of the cookies in the chocolate and sprinkle with nonpareils. The cookies can chill at room temperature, or be refrigerated to set faster
Nutrition
from The Recipe Critic https://ift.tt/zJKgIde



No comments:
Post a Comment