Monday, 22 May 2023

Creamy Scalloped Potatoes

Scalloped potatoes are thinly sliced layered potatoes baked in a creamy garlic and herb sauce, making them tender and flavorful. Hearty and easy to make, this is the perfect side dish to any meal! 

If you’re in need of an easy side dish that is sure to impress then this is the recipe for you! These thinly sliced potatoes bake up extra creamy. The entire dish is so flavorful thanks to the addition of garlic and herbs. Serve this alongside the Garlic and Herb Prime Rib, Beef Tenderloin, Beef Wellington, or this Classic Honey Glazed Ham.
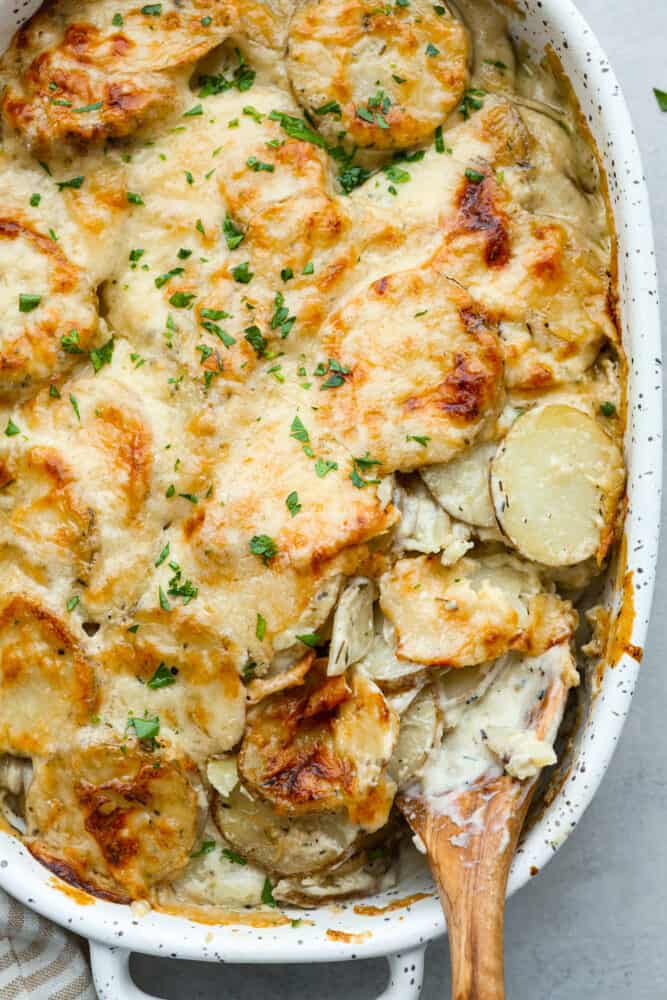
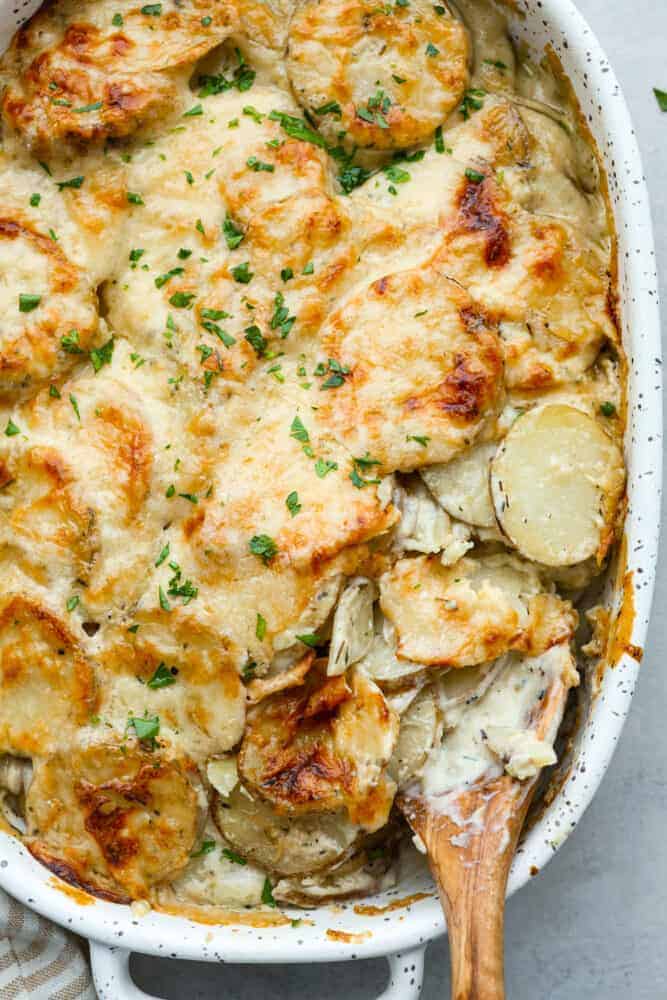
Hero image of a scoop of scalloped potatoes being taken out of a white baking dish.

The Best Scalloped Potatoes

Potatoes are basically side dish magic. They can do so many things. And no matter how you make them, they usually end up being the highlight of the meal! These scalloped potatoes are no different. This recipe is easy to make and only needs a handful of ingredients.

The scalloped potatoes are covered in a creamy sauce made with garlic and parmesan. It not only helps to tenderize the potatoes, but gives the dish the best flavor ever! These always fly off the table whenever I make them. They’re the perfect side dish to serve alongside any hearty meal!

Ingredients Needed

Making this hearty, flavorful side dish doesn’t require many ingredients at all! Here’s everything you need, keeping it short and sweet with things you’ll likely have on hand already. Exact measurements are in the recipe card below.

  • Yukon Gold or Russet Potatoes: These potatoes form the base of scalloped potatoes. They are starchy and hold their shape well during cooking, creating tender layers. Use either type based on your preference!
  • Whole Milk: Whole milk makes the sauce nice and creamy. It also adds richness and a smooth texture to the scalloped potatoes.
  • Heavy Cream: Combined with the whole milk to create a luscious texture. If you prefer a slightly lighter version, substitute with half and half.
  • Salt and Pepper: Ensure the potatoes and sauce are well-seasoned. Season to taste!
  • Bay Leaf: Infuses a gentle earthy and floral aroma into the dish.
  • Thyme: Thyme is a versatile herb with a minty and lemony taste. It complements the scalloped potatoes perfectly. Fresh or dried thyme both work!
  • Garlic: Garlic adds a strong, savory and delicious flavor to the scalloped potatoes. Use fresh minced garlic so your dish has the best flavor!
  • Parmesan Cheese: Freshly grated Parmesan cheese brings a sharp, nutty, and savory flavor to the dish. It forms a golden and crispy crust on top when baked, adding a delightful texture. You can also try using different types of cheese, like gruyere or cheddar!

What Potatoes are Best?

Russet potatoes or Yukon Gold potatoes are great choices for making scalloped potatoes. The reason behind that is the starches. This is going to help the sauce thicken and become velvety smooth during baking. Russets have the most starch, Yukon Golds come in close behind. The Yukon Golds themselves bake up a bit creamier than the Russets, but the sauce itself might be a bit thinner. It’s all about what you prefer. 

How to Make Scalloped Potatoes

These scalloped potatoes only take 15 minutes of prep time, which makes them perfect for popping in the oven before a gathering with friends or family!

  1. Preheat Oven, Prep Pan: Preheat oven to 350 degrees Fahrenheit. Spray a 2 quart glass or ceramic baking dish with non stick cooking spray and then set aside.
  2. Slice Potatoes: Clean and dry the potatoes. Slice the potatoes evenly into ¼ inch slices. You can peel the potatoes if you prefer before slicing, but it’s not required.
  3. Add Sauce Ingredients: In a large pot or dutch oven add the milk, cream, salt and white pepper. Stir to combine. 
  4. Stir in Seasonings: Add in the bayleaf, fresh thyme and garlic. Stir. Heat over medium/low heat just to heat the milk, not to bring to a boil. 
  5. Add Potatoes: Add in the potatoes. There isn’t enough cream to cover the potatoes. Carefully stir so that all of the potatoes are able to be warmed in the milk mixture. 
  6. Transfer to Baking Dish: Using a slotted spoon remove the potatoes from the cream and then lay in the baking dish in even layers. 
  7. Cover With Cream and Cheese: Pour the cream over the top of the potatoes. Then top with shredded parmesan cheese.
  8. Bake: Bake for 50-60 minutes uncovered at 350 degrees Fahrenheit until the potatoes are fork tender and the top is golden.
  9. Allow Sauce to Thicken: Remove from the oven and allow the dish to sit for at least 10 minutes prior to serving, this allows time for the cream to thicken slightly while cooling.
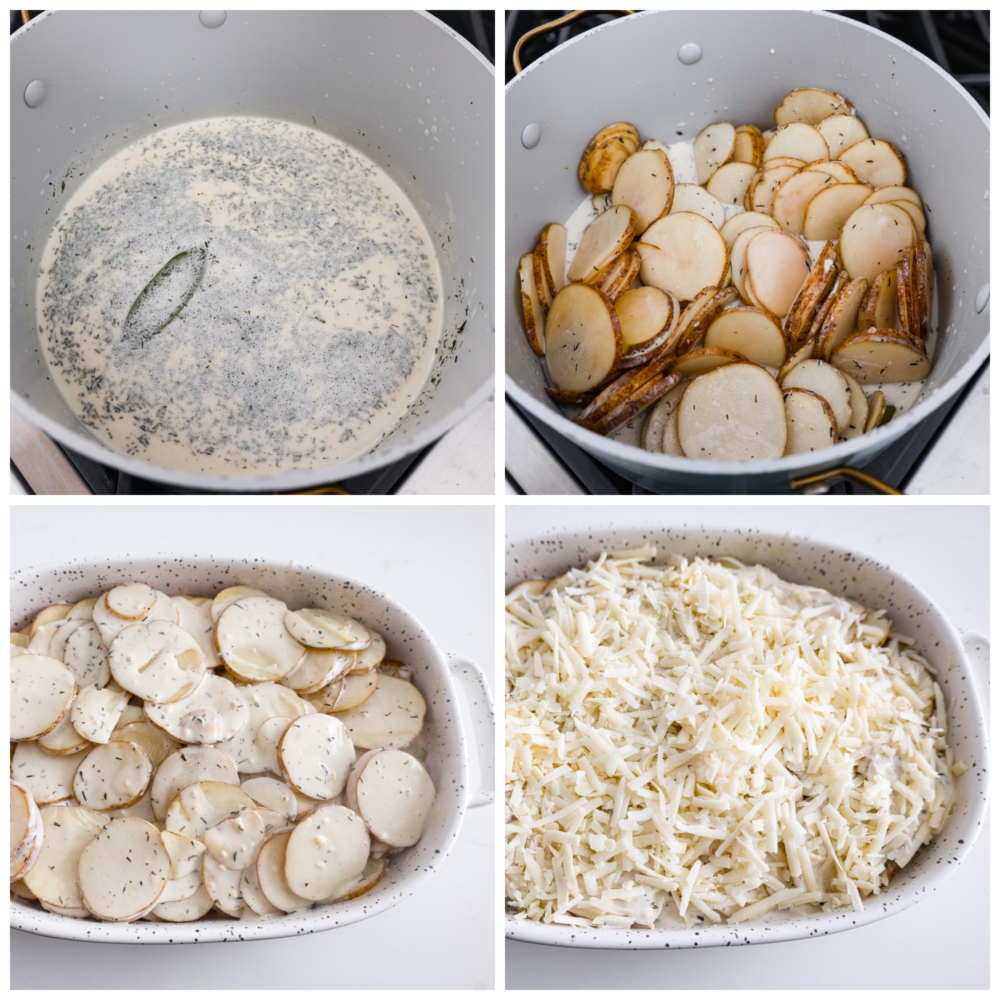
4-photo collage of potatoes and sauce being prepared.

Scalloped Potatoes vs. Potatoes Au Gratin

They’re actually different. Although, most people will use the terms interchangeably. Scalloped potatoes are traditionally sliced thinner, about 1/8th of an inch thick. Potatoes Au Gratin will have a thicker slice of ¼ inch. Scalloped potatoes are cooked in a cream sauce while potatoes au gratin are cooked in a cream sauce and layered with cheese. If you’re pro-cheese like me, then by all means, add cheese to your scalloped potatoes and call them whatever you want. In fact, we’ll be putting some fresh grated parmesan on these potatoes. Cheese and creamy potatoes just go together too perfectly.
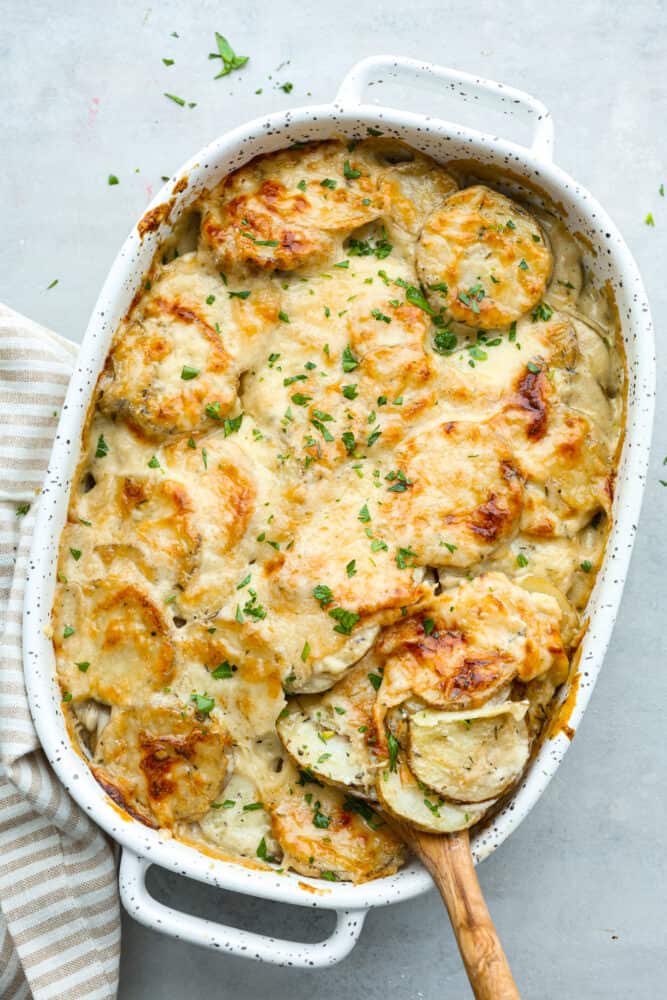
Zoomed out shot of a pan of scalloped potatoes.

Tips for Making the Best Scalloped Potatoes

Although scalloped potatoes are fairly easy to make, here are a few extra tips to keep in mind so they turn out perfectly.

  • Uniform Slices: The potatoes need to be sliced nice and thin. It’s also important that they are all cut to the same width. Using a sharp knife will help with this. If you have some thick slices and some thin slices, the potatoes will bake unevenly. The thicker slices won’t be cooked through and the thinner slices could cook too much and turn into mashed potatoes.
  • Use a Mandolin Slicer: If you have one of these on hand it will make the slicing process fly by quickly, just be careful with your fingers. 
  • Can I Omit the Heavy Cream? I don’t recommend it. The reason that cream or half and half is used in combination with the whole milk is that you need a high fat content. Otherwise, when baked, the milk will curdle and separate. Using cream prevents the curdling from taking place.
  • More Mix-Ins: Make these potatoes your own! Try adding cubed ham, caramelized onions, bacon, chives, green onions, herbs, you name it!

Storing Leftovers

Like a lot of other potato dishes, scalloped potatoes make great leftovers! Just let them cool down completely and then transfer them to an airtight container.

  • In the Refrigerator: Scalloped potatoes will last for up to 4 days. Make sure you keep them wrapped tightly with plastic wrap or stored in an airtight container.
  • Reheating: Reheat potatoes in the microwave until warmed through, or in the oven for about 10 minutes at 350 degrees Fahrenheit.
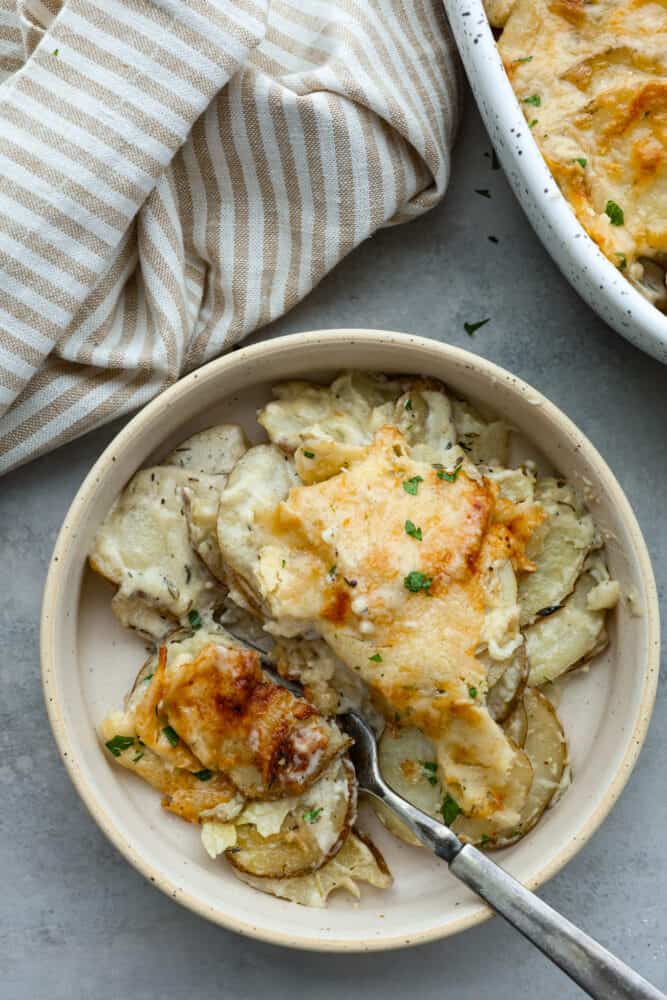
A serving of potatoes in a stoneware bowl.
Print

Creamy Scalloped Potatoes

Scalloped potatoes are thinly sliced layered potatoes baked in a creamy garlic and herb sauce, making them tender and flavorful. Hearty and easy to make, this is the perfect side dish to any meal! 
Course Side Dish
Cuisine American
Keyword scalloped potatoes
Prep Time 15 minutes
Cook Time 1 hour
Total Time 1 hour 15 minutes
Servings 8
Calories 172kcal
Author Alyssa Rivers

Ingredients

  • 3 pounds Yukon Gold or Russet Potatoes
  • 1 cup whole milk
  • 1 cup heavy cream
  • 2 tsp salt
  • 1 tsp ground pepper
  • 1 bayleaf
  • 2 teaspoons thyme
  • 3 cloves garlic minced
  • 1 cup parmesan cheese freshly grated

Instructions

  • Preheat oven to 350 ℉. Spray a 2 quart glass or ceramic baking dish with non stick cooking spray and set aside.
  • Clean and dry the potatoes. Slice the potatoes evenly into ¼ inch slices. You can peel the potatoes if you prefer before slicing, but it's not required.
  • In a large pot or dutch oven add the milk, cream, salt and white pepper. Stir to combine.
  • Add in the bayleaf, fresh thyme and garlic. Stir. Heat over medium/low heat just to heat the milk, not to bring to a boil.
  • Add in the potatoes. There isn't enough cream to cover the potatoes. Carefully stir so that all of the potatoes are able to be warmed in the milk mixture.
  • Using a slotted spoon remove the potatoes from the cream and lay in the baking dish in even layers.
  • Pour the cream over the top of the potatoes.
  • Top with shredded parmesan cheese.
  • Bake for 50-60 minutes uncovered at 350℉ until the potatoes are fork tender and the top is golden.
  • Remove from the oven and allow the dish to sit for at least 10 minutes prior to serving, this allows time for the cream to thicken slightly while cooling.

Notes

Originally posted December 18, 2019
Updated on May 22, 2023

Nutrition

Calories: 172kcal | Carbohydrates: 3g | Protein: 6g | Fat: 15g | Saturated Fat: 9g | Cholesterol: 52mg | Sodium: 661mg | Potassium: 79mg | Fiber: 1g | Sugar: 2g | Vitamin A: 584IU | Vitamin C: 1mg | Calcium: 204mg | Iron: 1mg


from The Recipe Critic https://ift.tt/tX19RnO

Blueberry Galette

This easy blueberry galette is the perfect dessert to bake when fresh summer blueberries are in season or any time of the year. Using refrigerated pie dough makes it even faster! Blueberry Galette Making a blueberry galette is simpler than a blueberry pie or tart as it’s basically a free-form pie without a pie dish.

from Skinnytaste https://ift.tt/2g8Lxcr

Grilled Mexican Street Corn

Grilled Mexican Street Corn is the perfect grilled corn slathered with an amazing mayonnaise blend and topped with parmesan cheese and chili powder. This is one of the best corn recipes you will eat!

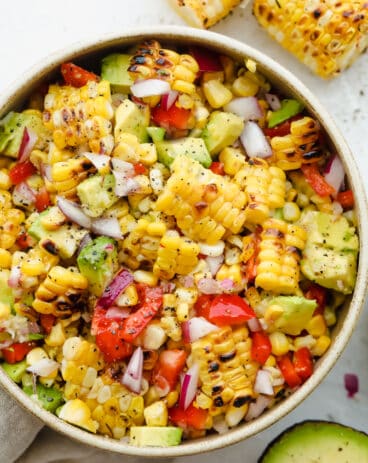
Corn recipes are so delicious! Try my Easy Grilled Corn or my Amazing Mexican Corn Salad recipe for another great reason to fire up your grill!

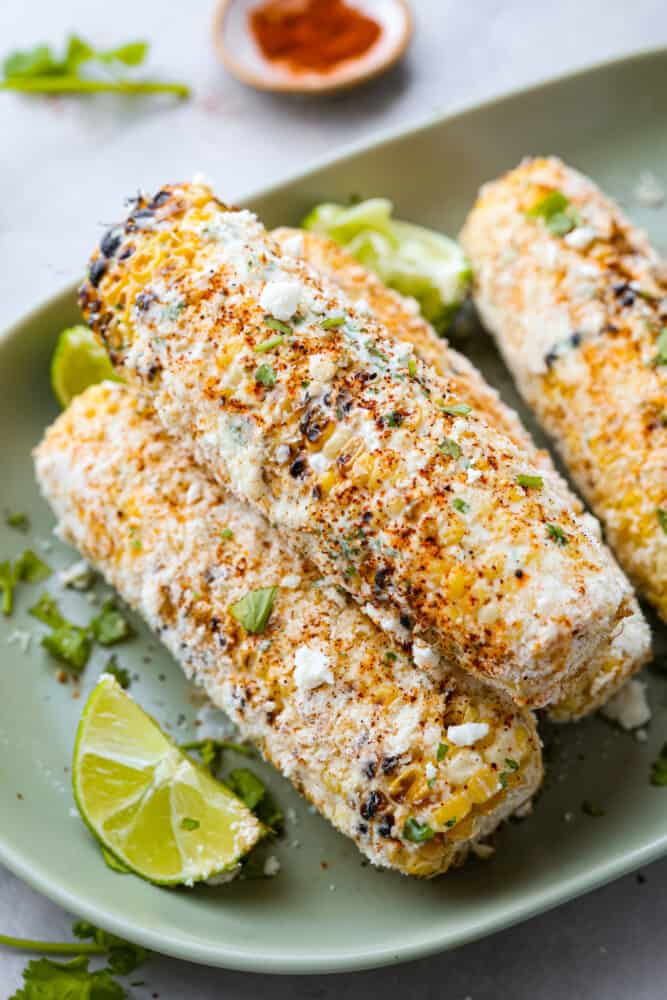
A sage green platter with 4 ears of corn slathered with the mayonnaise mixture and sprinkles with spices and cheese. Lemon wedges garnish the plate.

Grilled Mexican Street Corn

Grilling season is in full force over here at our house. We love to grill! And grilled veggies are so delicious and fresh. My entire family (including the picky one) loves to eat corn, so we have it regularly. I love regular corn on the cob, but this Mexican grilled corn is taking it to a whole new level. This was the best corn that I have EVER had!

Not only is corn delicious and healthy, but it goes with just about anything. It’s a staple recipe at our barbeques because it pairs well with Homemade Smash Burgers, delicious Grilled Asian Garlic Steak Skewers, and also this delicious Grilled Shrimp. Make this corn at your next outdoor get-together, and you will be cooking it up all summer long!

What is Mexican Street Corn Made of?

All of these ingredients combined are incredible. How can you really go wrong with fresh sweet, grilled corn? Top it off with great spices, and you have an insanely delicious mixture of flavor! For a list of the ingredient measurements, check out the recipe card at the bottom of the post.

  • Corn: Choose the freshest corn for the best results!
  • Mayonnaise: Creamy base that holds all the delicious flavor. I like to make my mayo at home using this recipe 
  • Sour cream: Mix together with the mayonnaise and seasoning mixture.
  • Cilantro: Freshly chopped and mixed together with creamy sauce.
  • Parmesan: Freshly grated parmesan gives a great salty, nutty flavor.
  • Lime: Lime juice from 2 limes adds a fresh tangy flavor.
  • Red chili powder: Add according to your spice preference.
  • Limes: 2 cut into wedges for garnish.

How to Pick Out Fresh Corn

When you are looking for the best corn to use for Mexican street corn, you will want to look for corn that has a bright green husk with no small brown holes in it.  The holes could mean insects, so you want to avoid those!  The tassel at the top of the corn should be a little bit sticky and a light brown color.  Do not pull back on the stalks to check the corn kernels because that will shorten the life span of the corn.  Instead, smell for a sweet corn smell and squeeze to make sure the corn is firm and not missing kernels.

How to Make Grilled Mexican Street Corn:

The corn grills to perfection on the grill alongside whatever meat you are cooking. As soon as it comes off the grill, it gets slathered in a mayonnaise and sour cream cilantro mixture. Then it is topped with parmesan cheese and chili powder.  Yum!

  1. Prepare the Corn: Remove the husks of the corn, leaving the core attached.
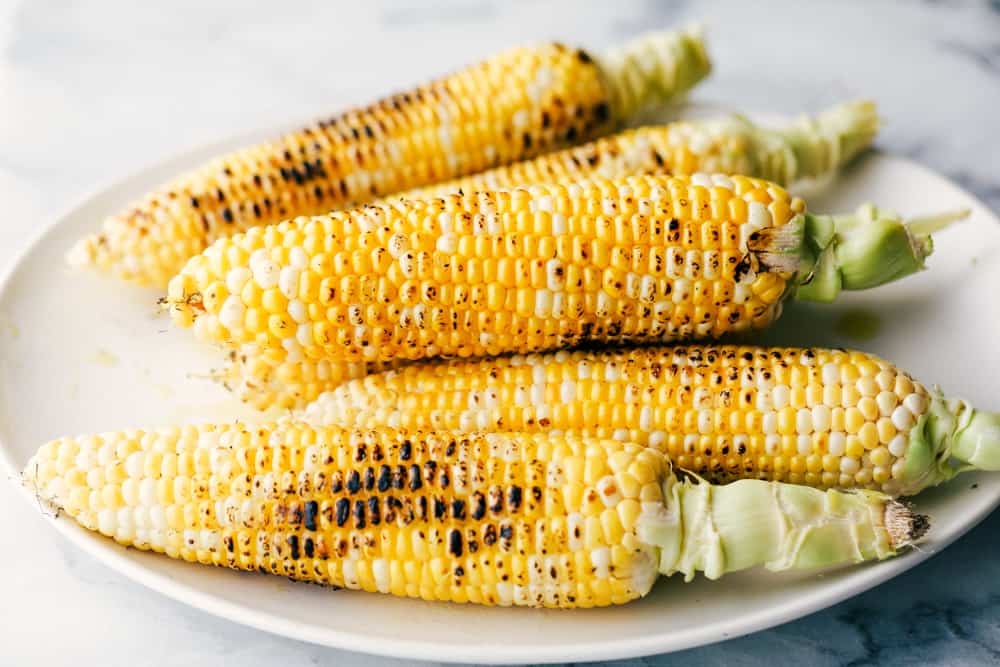
  2. Grill: Place the corn on a hot grill turning once. Or use a cast iron pan until it starts to get slightly charred.
  3. Make the dressing: In a small bowl, mix the mayonnaise, sour cream, and cilantro.
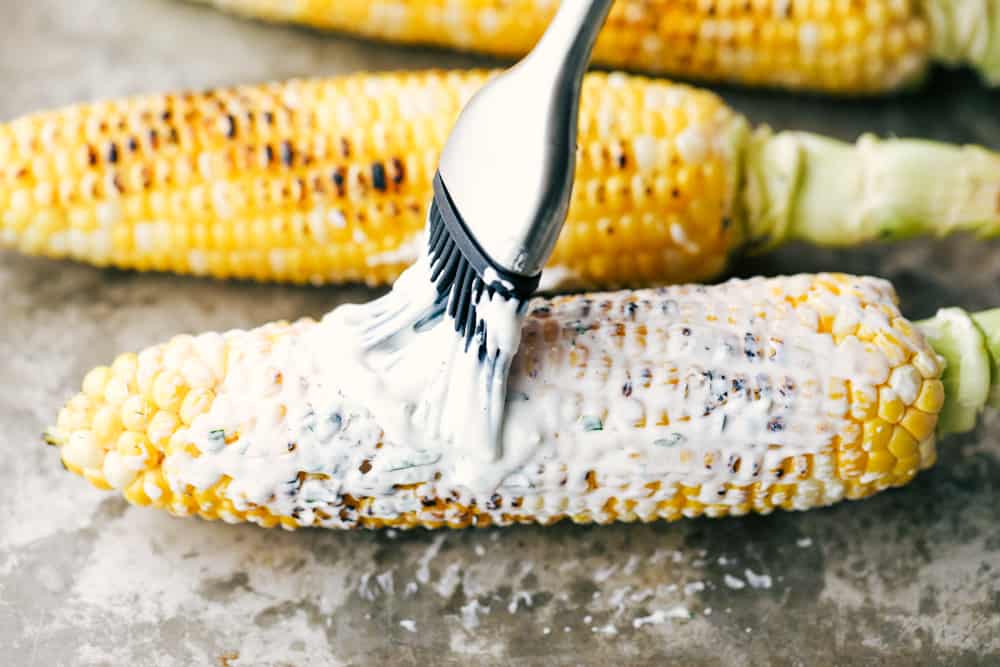
  4. Brush corn with dressing: Remove the corn from the grill and slather with the mayonnaise mix. Squeeze the lime juice over the corn and generously sprinkle with parmesan and cotija cheese. Sprinkle with chili powder. Serve immediately.
Grilled corn stacked on a white plate.

Variations of Grilled Mexican Street Corn:

There are many versions of Mexican Street Corn floating around.  Here are some ideas for taking this tried and true grilled corn recipe and making it your own!

  • Make it into a Salsa: Cutting the corn off the cob once it is grilled, then mix it with the mayonnaise sauce in a bowl.  Serve with chips.
  • Cook it in the Oven: Don’t let rainy days or cooler weather stop you from enjoying this amazing corn!  Make in the oven or on a stovetop skillet instead.  To prepare in the oven, you will heat your oven to 425 degrees Fahrenheit.  Then, spray the corn with cooking spray or slather it with butter or oil.  Finally, wrap in foil and cook for 20-25 minutes. 
  • Cook Corn on a Skillet: To use a skillet (I recommend using cast iron), heat your pan to medium-high and turn corn occasionally until it is grilled on all sides.
  • Mexican Crema: Use in place of sour cream.  It is similar to sour cream, just a little thinner and saltier.
  • Cotija Cheese: An authentic Mexican cheese that can be used in place of parmesan cheese for an even more authentic dish.
Grilled corn being brushed with mayonnaise.

Tips for Grilling Corn

  • How do I keep my corn from drying out as it cooks? Brush oil on your corn before putting it on the grill to keep it from drying.  Or, place the corn in a large bowl of cold salt water (about 1 tbsp of salt) for 10-15 minutes before cooking it on the grill to keep it moist.
  • How do I know when the corn is done? It is done when your corn is tender when poked with a knife or fork.
  • Do I leave the grill open or closed? Keep the grill lid closed for the most consistent temperature and only open it to turn the corn every 5-6 minutes.
  • Do I grill the corn with husks on or off? This is ultimately a personal preference.  I prefer to have the corn ready to slather in sauce and eat right off the grill, so I cook it with the husks already removed.  I also love to see the grill marks directly on the yellow corn.  However, your corn will also turn out fantastic if you leave the husks on when you grill it.  The husks will keep the heat in and the corn will not dry out as easily.  To achieve this same effect without leaving the husks on, you could wrap the corn in aluminum foil before placing on the grill.
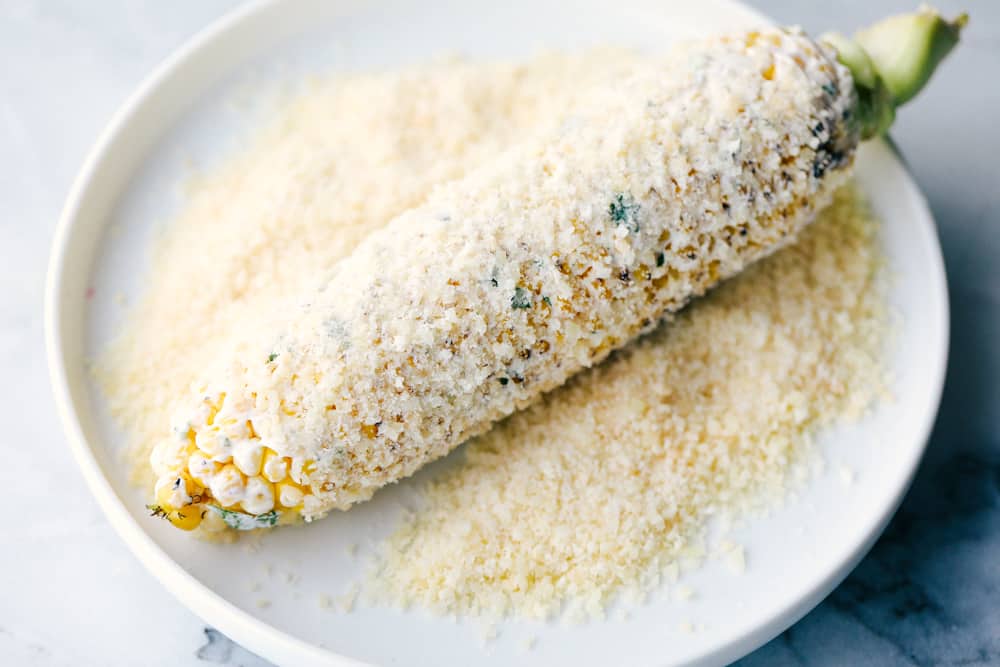
Grilled corn coated with mayonnaise and being rolled in Parmesan cheese.

Storing Grilled Mexican Street Corn

Before storing your Mexican Street Corn, allow it to cool completely.  You will need to store the grilled corn and the topping separately. 

In the Refrigerator: Store grilled corn on the cob by wrapping it tightly and placing it in the fridge for 2-3 days. The mayonnaise-based sauce will not freeze well but will stay good in a separate airtight container in the refrigerator for about a week.

In the Freezer: You can store grilled corn on the cob in an airtight container in the freezer for up to 10 months. 

A close up of 4 Mexican grilled ears of corn on a green platter.
Print

Grilled Mexican Street Corn

Grilled Mexican Street Corn is the perfect grilled corn slathered with an amazing mayonnaise blend and topped with parmesan cheese and chili powder. This is one of the best corn recipes you will eat!
Course Side Dish
Cuisine Mexican
Keyword corn recipes, grilled corn, grilled mexican street corn, mexican street corn
Prep Time 10 minutes
Cook Time 15 minutes
Total Time 25 minutes
Servings 4 Servings
Calories 208kcal
Author Alyssa Rivers

Ingredients

  • 4 ears corn
  • 3 tablespoons mayonnaise
  • 1/2 cup sour cream
  • 1/4 cup cilantro, freshly chopped
  • 1/2 cup Parmesan cheese, freshly grated
  • 1/4 cup cotija cheese
  • 1 lime, juiced
  • chili powder, to taste
  • 2 limes cut into wedges, for garnish

Instructions

  • Remove the husks of the corn leaving the core attached.
  • Grill the corn by turning on a hot grill or cast iron pan. Cook until it starts to get slightly charred on all sides.
  • In a small bowl mix the mayonnaise, sour cream, and cilantro.
  • Remove the corn from the grill and slather it with the mayonnaise mixture using a basting brush.
  • Squeeze the lime juice over the corn and sprinkle it generously with parmesan cheese and cotija cheese. Sprinkle with chili powder and enjoy!

Notes

Updated on June 8, 2020
Originally Posted on June 18, 2015

Nutrition

Serving: 1corn | Calories: 208kcal | Carbohydrates: 4g | Protein: 7g | Fat: 19g | Saturated Fat: 7g | Polyunsaturated Fat: 5g | Monounsaturated Fat: 4g | Trans Fat: 0.02g | Cholesterol: 38mg | Sodium: 384mg | Potassium: 80mg | Fiber: 1g | Sugar: 1g | Vitamin A: 402IU | Vitamin C: 5mg | Calcium: 230mg | Iron: 0.3mg


from The Recipe Critic https://ift.tt/MP3TyjQ

Sunday, 21 May 2023

Coconut Curry Chicken

Coconut curry chicken is a mouthwatering dish that combines tender chicken, hearty vegetables, and a blend of aromatic spices, all simmered in a luscious coconut milk sauce. Serve it up with naan and basmati rice for a meal your family won’t be able to get enough of!

Curry is so comforting and delicious. After you try this amazing coconut curry chicken, you’ll have to make chicken tikka masala or massaman curry!

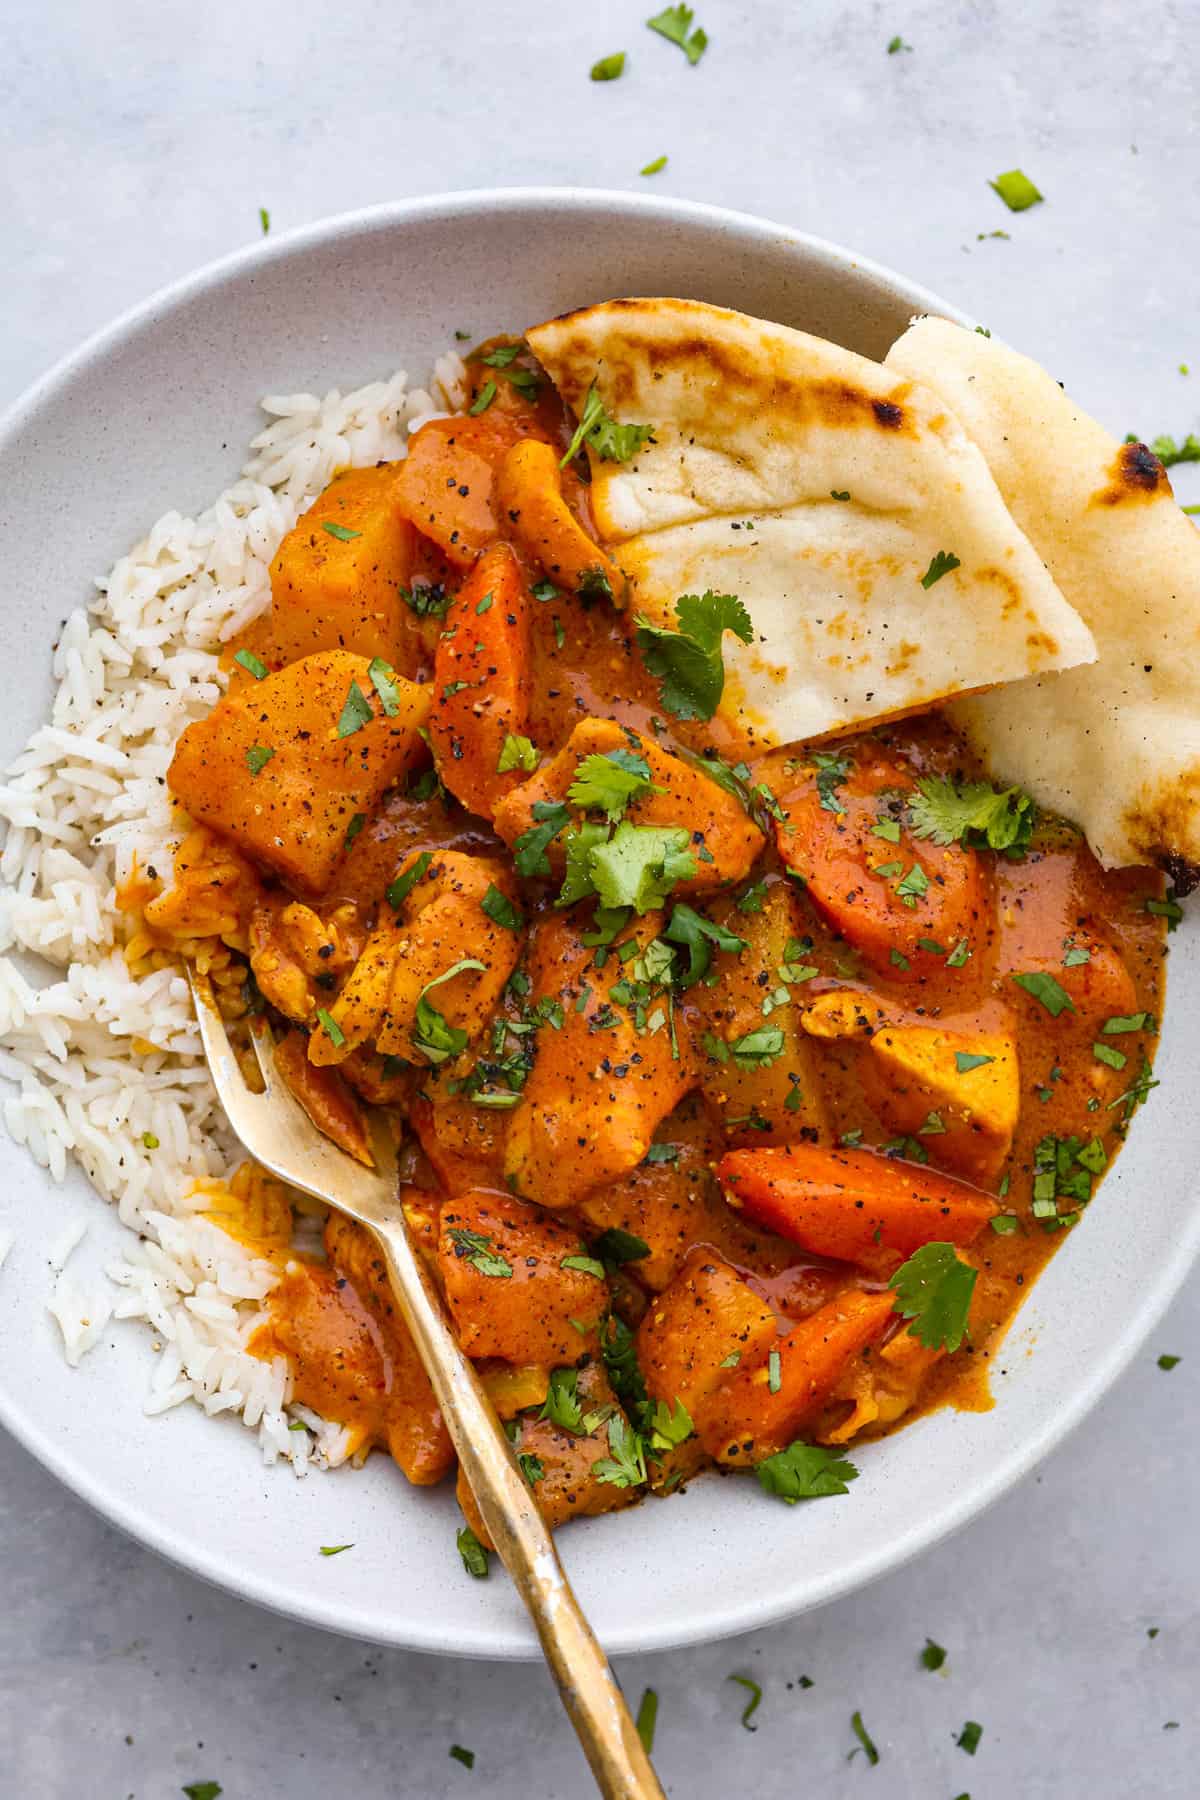
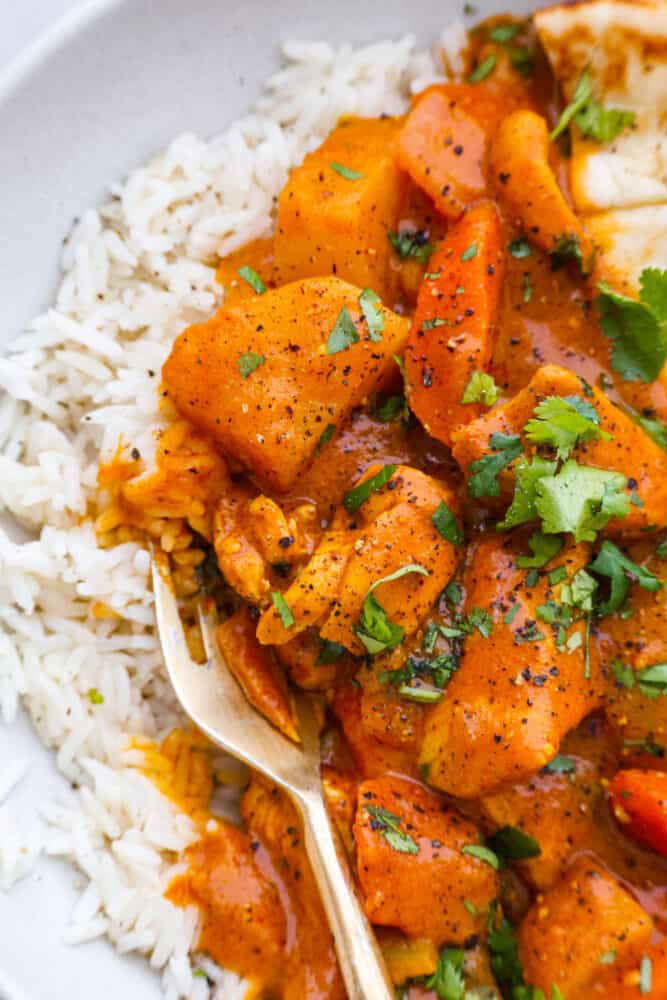
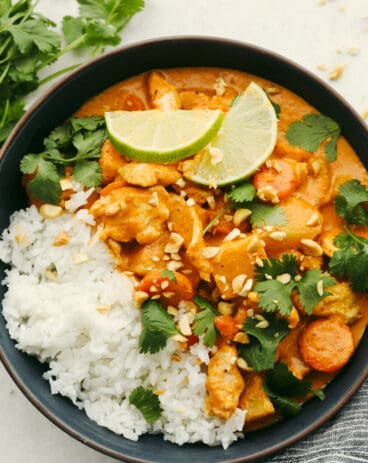
Coconut curry served over white rice with naan.

Coconut Curry With Chicken

Made with tender chicken, diced potatoes, flavorful chickpeas, and a medley of spices, this coconut curry chicken will have your taste buds singing. It’s the perfect comfort food and is sure to have you coming back for seconds! Serve it with some fluffy white rice for a meal the whole family will love.

Not only is this coconut curry chicken incredibly tasty, but it’s also a breeze to prepare. With just a few simple steps, you’ll have a wholesome and satisfying meal ready to enjoy in no time. It may even rival your favorite Thai takeout spot! Let’s get started with the ingredients and spices you’ll need to make it.

Ingredients for Coconut Curry

Coconut curry chicken is so flavorful and delicious! The only way to achieve this is by making sure you have all of the necessary spices and seasonings on hand. You may need to make a trip to your local Asian market!

  • Chicken Breasts: The main protein of the dish. If desired, you can substitute boneless chicken thighs for a more juicy option.
  • Potatoes: No Thai curry is complete without some soft, delicious potatoes!
  • Chickpeas: These are packed with fiber and protein, adding some extra nutrition to the dish.
  • Diced Carrots: Carrots bring a pop of color and a hint of natural sweetness to balance the spices.
  • Vegetable Oil: This oil is used for sautéing the onions, garlic, and ginger in, helping to build the flavorful base of the curry.
  • Yellow Onion: Yellow onion caramelizes beautifully when cooked, releasing its natural sweetness and enhancing the overall flavor.
  • Garlic: You can never go wrong with garlic. Add some in so your curry has the perfect savory flavor!
  • Fresh Ginger: Adds a bright and slightly spicy kick to the coconut curry chicken.
  • Tomato Paste: Helps to thicken the sauce and gives it more flavor.
  • Curry Powder: Curry powder gives the dish its distinct flavor and adds a mild, warm spiciness.
  • Seasonings and Spices: I used a mix of curry powder, turmeric, and salt and pepper to add flavor to the curry.
  • Full-Fat Coconut Milk: Tones down the heat of the curry and also adds a delicious creaminess.
  • Cilantro and Rice (For Serving): Fresh cilantro is used as a garnish, giving the dish some extra flavor. Serve the coconut curry chicken over a bed of fluffy white rice to absorb all the tasty flavors!

How to Make Coconut Curry in a Slow Cooker

Using a crockpot to cook your curry helps all of the delicious flavors meld together. It’s also great because you can prepare it in the morning, and then have a hearty, delicious meal to come home to in the evening.

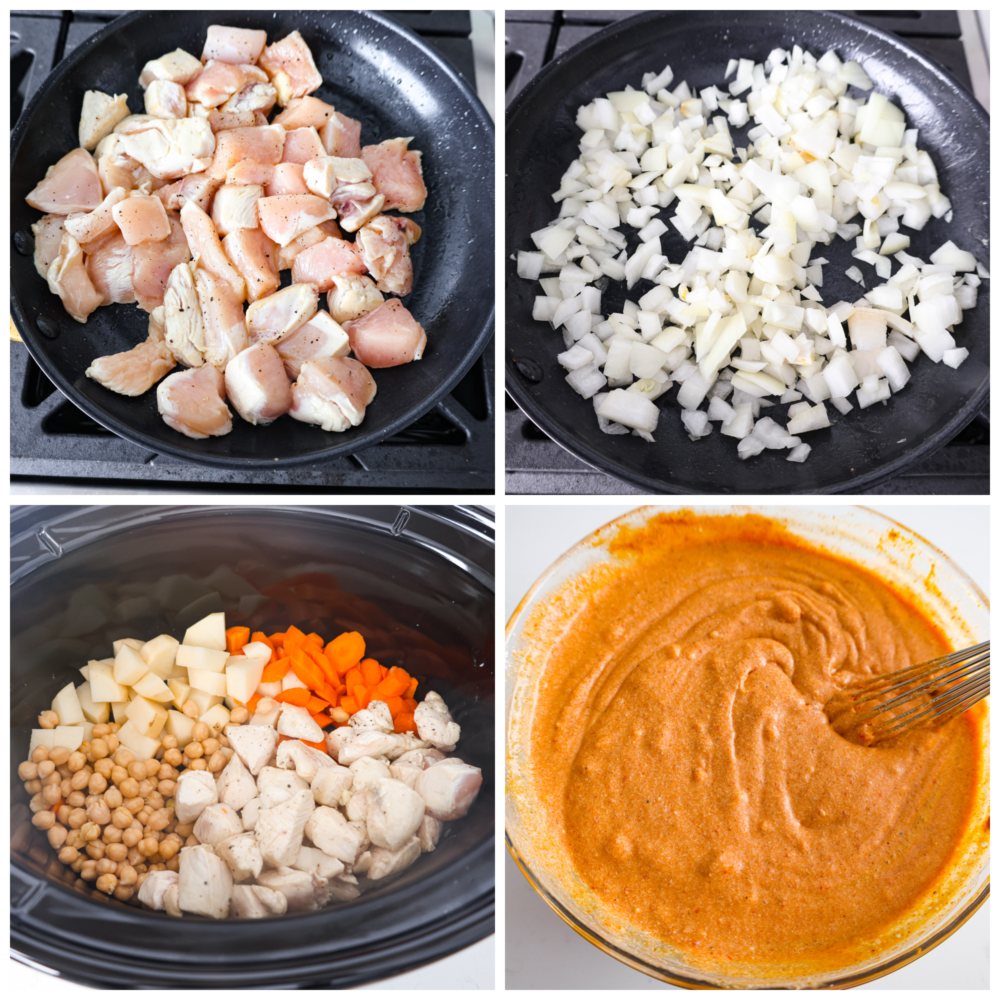
  1. Prepare Chicken, Heat Pan: Prepare your chicken by chopping it into 2 inch pieces and seasoning with some salt and pepper. Then heat a skillet over medium-high heat with 1 tablespoon of vegetable oil. Saute the chicken for 5-8 minutes, until just seared on all sides.
  2. Add Ingredients to Slow Cooker: To the slow cooker add your seared chicken, potatoes, chickpeas, and carrots, set aside while you prepare your sauce.
  3. Sauté Vegetables: In the skillet you cooked your chicken in, heat your oil over medium high heat, then add the onion to the pan and saute for 3-4 minutes. Add in your garlic and ginger and saute for about 1 minute more.
  4. Add Remaining Sauce Ingredients: To the saucepan add your tomato paste, curry powder, turmeric, salt, pepper, and coconut milk. Whisk everything together well, then remove from heat.
  5. Cook: Pour your sauce over your chicken and vegetables in the slow cooker, then cover with the lid and cook for 4 hours on high. You can also cook on low for 8 hours.
  6. Serve: Serve fresh over rice with some chopped cilantro on top.
4-photo collage of chicken and veggies being sauteed, then added to a slow cooker with the curry sauce.

Cooking Tips

These are a couple of extra tips to help you make the best coconut chicken curry possible. This curry is so creamy, and the chicken is so tender, I know your family will love it as much as mine does. Even my youngest, who is the pickiest eater I’ve ever encountered, can never get enough!

  • Sear the Chicken: Don’t skip searing the chicken cubes before adding them to the slow cooker. This step helps to lock in the juices and develop a nice golden color.
  • Use Full-Fat Coconut Milk: Go for full-fat coconut milk when making coconut curry chicken. It has a creamier texture and richer taste compared to light coconut milk.
  • Adjust Seasoning: Once the cooking time is complete, taste the curry and adjust the seasoning with salt, pepper, or additional spices if needed. Remember to add seasonings slowly until you reach your desired flavor.
  • Low-Carb Version: To make this dish work for low-carb or keto diets, swap the white rice or cauliflower rice.
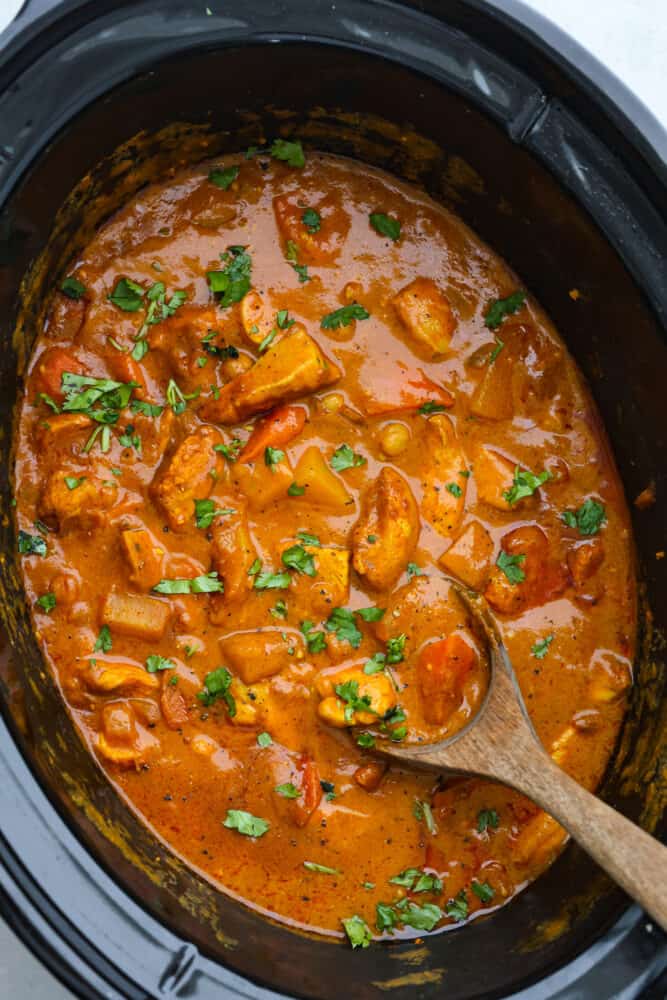
Coconut curry chicken in a slow cooker.

Storing Leftovers

To store leftover coconut curry chicken, allow it to cool completely before transferring it to an airtight container or airtight freezer bags.

  • In the Refrigerator: If stored properly, your curry will stay good for up to 4 days.
  • In the Freezer: If you need to keep it longer, you can freeze it for up to 2-3 months. Let thaw overnight in the fridge before reheating.
  • To Reheat: Pop your coconut curry in the microwave or heat it up on the stove until warmed through. If it has gotten too thick, you can add a splash of coconut milk to adjust the consistency.
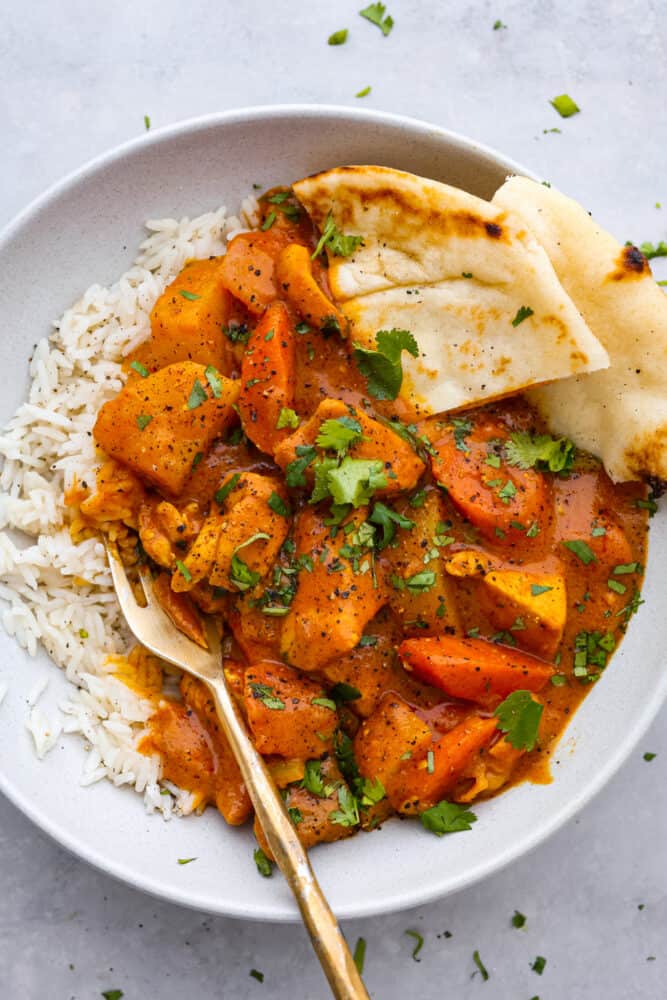
Closeup of curry garnished with cilantro.
Print

Coconut Curry Chicken

Coconut curry chicken is a mouthwatering dish that combines tender chicken, hearty vegetables, and a blend of aromatic spices, all simmered in a luscious coconut milk sauce. Serve it up with naan and basmati rice for a meal your family won’t be able to get enough of!
Course Dinner
Cuisine Thai
Keyword coconut curry, coconut curry chicken, coconut curry recipe, thai coconut curry, thai coconut curry recipe
Prep Time 30 minutes
Cook Time 4 hours
Total Time 4 hours 30 minutes
Servings 8 people
Calories 340kcal
Author Alyssa Rivers

Ingredients

  • 2 boneless skinless chicken breasts cubed
  • 2 large potatoes skinned and diced
  • 1 15 ounce can chickpeas drained and rinsed
  • 2 large carrots diced
  • 2 tablespoons vegetable oil
  • 1 medium yellow onion minced
  • 2 cloves garlic minced
  • ½ teaspoon fresh ginger minced
  • 1 6 ounce can tomato paste
  • 3 tablespoons curry powder
  • 1 teaspoon turmeric
  • 1 teaspoon salt more to taste
  • ½ teaspoon pepper
  • 2 15 ounce cans coconut milk full fat
  • Cilantro and rice for serving

Instructions

  • Prepare your chicken by chopping it into 2 inch pieces and seasoning with some salt and pepper. Heat a skillet over medium high heat with 1 tablespoon of vegetable oil. Saute the chicken for 5-8 minutes, until just seared on all sides.
  • To the slow cooker add your seared chicken, potatoes, chickpeas, and carrots, set aside while you prepare your sauce.
  • In the skillet you cooked your chicken, heat your oil over medium high heat, add the onion to the pan and saute for 3-4 minutes. Add in your garlic and ginger and saute for about 1 minute more.
  • To the saucepan add your tomato paste, curry powder, turmeric, salt, pepper, and coconut milk. Whisk everything together well, remove from heat.
  • Pour your sauce over your chicken and vegetables in the slow cooker, cover with the lid and cook for 4 hours on high, or on low for 8 hours.
  • Serve fresh over rice with some chopped cilantro on top.

Nutrition

Calories: 340kcal | Carbohydrates: 40g | Protein: 14g | Fat: 15g | Saturated Fat: 12g | Polyunsaturated Fat: 1g | Monounsaturated Fat: 1g | Trans Fat: 0.004g | Cholesterol: 18mg | Sodium: 698mg | Potassium: 693mg | Fiber: 5g | Sugar: 4g | Vitamin A: 2966IU | Vitamin C: 8mg | Calcium: 67mg | Iron: 5mg


from The Recipe Critic https://ift.tt/JX8FKjB