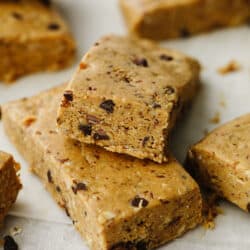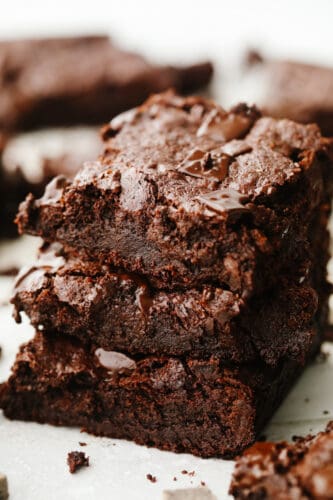
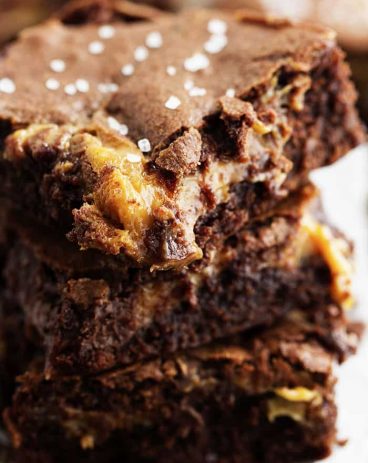
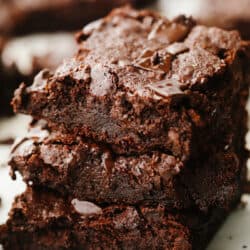
These flourless chocolate brownies are absolute heaven! The thin, chewy texture and sweet flavor are so delicious that I bet that you can’t just stop at one!
If you are in need of some more amazing chocolate desserts then you MUST TRY this Chocolate Pie, Best Ever Fantasy Fudge, and this yummy Texas sheet cake!

What ARE Flourless Chocolate Brownies?
Just like you would expect from the name, these brownies have no flour in them! SO not only does that mean that these brownies are perfect for any and all of your gluten-free friends but… it means they are chewy and rich and insanely delicious! I’m sure that you’ve made these types of brownies from a box a million times but I am here to tell you to throw those boxes away. This homemade version is so much better.
It’s not even like you are giving up much extra time to make these flourless brownies from scratch. They still only take 10 minutes of prep time before you pop them in the oven! Homemade cakes, brownies, and cookies just cannot be beat and this recipe is no exception. It will quickly move up to the top of your list. Give them a try and you will never go back. Even if you normally eat gluten, you will still love these brownies!
Ingredients in Flourless Chocolate Brownies
As you may guess, one ingredient will be absent from this list and that is the flour! Everything else is so easy and you probably already have most of this stuff in your kitchen. See the recipe card at the bottom of the post for exact measurements.
- Butter: You will melt this butter (unsalted) to bring moisture to the brownies.
- Semi Sweet Bakers Chocolate: You will chop this up to put into the brownies and also to garnish on top.
- Granulated Sugar: The sugar sweetens these up.
- Salt: The salt will enhance all of the flavors.
- Vanilla: Vanilla brings out all of the sweet flavors in this recipe.
- Eggs: I used large eggs for these brownies.
- Dark Cocoa Powder: This is what you use to get that deep, chocolate flavor!
- Cornstarch: This is used to get that chewy texture.
- Chocolate Chips: You can use these or any extra chocolate chunks that you’ve already chopped up.
Let’s Make Some Brownies!
These flourless chocolate brownies only take 40 minutes from start to finish. And most of that is baking time! That’s why you need to turn away from the boxed mix and never look back!
- Preheat and prep the pan: Preheat the oven to 350° and line an 8×8 pan with parchment paper. Spray is lightly with pan spray and set aside.
- Melt butter and chocolate: Use a microwave to gently melt the butter and chopped chocolate in 30 second intervals until fully melted and combined.
- Whisk: Whisk in the sugar, vanilla and salt. Whisk in the eggs one at a time until just combined. Add the cocoa powder and cornstarch until fully combined and no lumps remain.
- Pour and bake: Pour the batter into the prepared baking pan and sprinkle the chocolate chips or chunks over the top. Bake for 25-30 minutes, until the center is just set and a toothpick comes out clean. Be careful not to over bake it, it should just barely be baked through.
- Cool and cut: Allow the brownies to cool completely before removing from the pan and slicing.

What Does the Cornstarch Do?
Don’t leave out the cornstarch! It’s a secret ingredient to making these flourless chocolate brownies have that thin, shiny crust on the top. You know, the one that flakes off as you eat the brownie? The cornstarch is necessary to really improve the texture of the brownie and remember because the brownies don’t have flour they won’t be cakey. They are supposed to be chewy and melt in your mouth delicious!

How to Store Leftovers
Once your brownies have cooled then place them in an airtight container. You can store them at room temperature for 3-4 days!

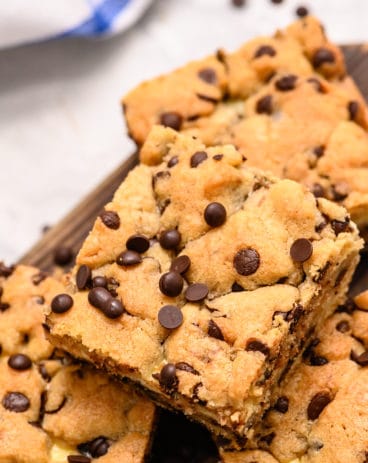
More Brownie Recipes to Try
Desserts
Chocolate Chip Cheesecake Brownies
Desserts
Salted Caramel Brownies
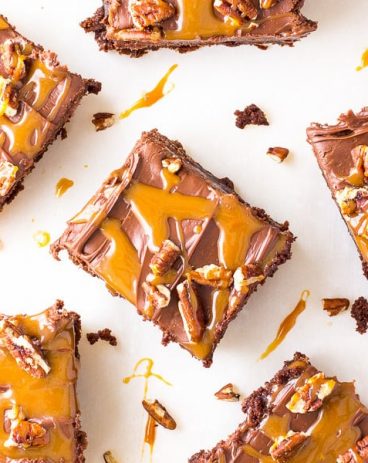
Desserts
Frosted Turtle Brownies
Flourless Chocolate Brownies
Ingredients
- 1/3 Cup Melted Butter
- 8 ounces Semi Sweet Bakers Chocolate chopped
- ¾ Cup Granulated Sugar
- 1/4 teaspoon Salt
- 1 teaspoon Vanilla
- 2 large Eggs Beaten
- 3 Tablespoons Dark Cocoa Powder
- 2 Tablespoons Cornstarch
- 1/4 Cup Chocolate chips or chocolate chunks
Instructions
-
Preheat the oven to 350° and line an 8×8 pan with parchment paper. Spray lightly with pan spray and set aside.
-
Use a microwave to gently melt the butter and chopped chocolate in 30-second intervals until fully melted and combined.
-
Whisk in the sugar, vanilla, and salt. Whisk in the eggs one at a time until just combined. Add the cocoa powder and cornstarch until fully combined and no lumps remain.
-
Pour the batter into the prepared baking pan and sprinkle the chocolate chips or chunks over the top. Bake for 25-30 minutes, until the center is just set and a toothpick comes out clean. Be careful not to overbake it, it should just barely be baked through.
-
Allow the brownies to cool completely before removing them from the pan and slicing.
Nutrition
from The Recipe Critic https://ift.tt/3t0BSCu