Tuesday, 31 May 2022

Cucumber Sandwich

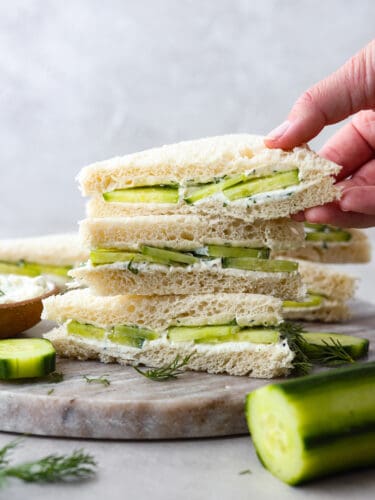
Cool and crisp, cucumber sandwiches are the perfect summer appetizer! Each sandwich is lined with a creamy lemon herb spread for a pop of zesty flavor. You’ll love them!

Cucumber sandwiches are so easy to make and the perfect finger food for parties, picnics, and more! For more great crowd-pleasing appetizers, try these avocado deviled eggs, bruschetta, or a simple charcuterie board!
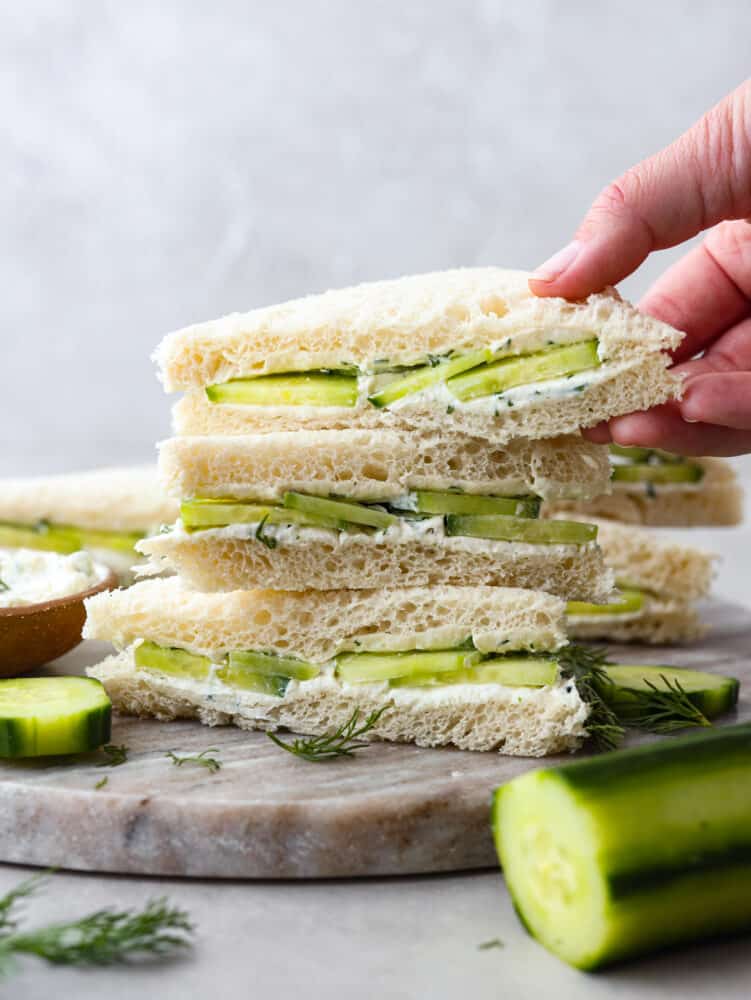
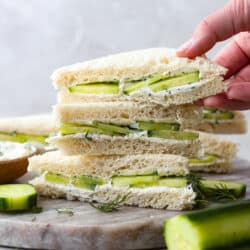
Front view of a stack of 3 cucumber sandwiches, the one on top being picked up.

Cucumber Sandwich With Creamy Lemon Dill Spread

Cucumber sandwiches are a traditional English dish usually reserved for tea parties. They consist of thin slices of cucumber on crustless, buttered bread. Today’s recipe features an AMAZING cream cheese spread flavored with zesty dill and lemon. Cucumber sandwiches may seem simple, but trust me, they taste out of this world! They’re cool, crisp, and beyond flavorful!

Cucumber sandwiches are a great appetizer for baby and bridal showers because not only do they taste amazing, but they’re super easy to whip up for a crowd! Soft white bread, crisp cucumber, and a creamy spread loaded with fresh herbs are the fixings of a perfect summer dish! They’re great for school lunches too! My kids are obsessed with dill pickles so this is one of their favorite treats.

Cucumber Sandwich Ingredients

The great thing about this cucumber sandwich recipe is that it uses super simple ingredients! However, I do recommend using fresh herbs to give your creamy spread the best flavor possible. Measurements for each of these ingredients can be found in the recipe card at the end of the post.

  • Cream Cheese: This acts as the foundation of your spread. It makes it thick and creamy!
  • Mayonnaise: You can use storebought mayo or make your own at home! Find my full recipe here.
  • Lemon Juice: Lemon and dill are a match made in heaven! Use fresh lemon juice if possible for the best flavor.
  • Chives: I love adding chopped chives to dips and spreads because they add delicious savory flavor to each bite. You can also use chopped green onions as a substitute!
  • Herbs: I used a combination of fresh dill and parsley for bright, zesty flavor!
  • Salt and Pepper: Add both to taste!
  • Cucumbers: I used English cucumbers because they have a sweeter, more delicate flavor and don’t require peeling!
  • White Bread: The traditional version of this recipe has crusts removed, but you can keep the crust on if you’d like! Also, feel free to experiment with different types of bread. Whole-grain breads work, too!

How to Make Cucumber Sandwiches

This is the perfect appetizer to make in a pinch! Cucumber sandwiches come together in minutes! They’ve been a life-saver for when I need to bring something to a potluck and I’m short on time.

  1. Prepare Cream Cheese Mixture: In a bowl add your cream cheese, mayonnaise, lemon juice, chives, dill, parsley, salt and pepper, and mix it all together.
  2. Add to Bread Slices: Take two slices of bread and spread the mixture on each one.
  3. Layer With Cucumber Slices: Layer your cucumber slices on top of one slice, and then put the pieces of bread together.
  4. Cut and Serve: Cut it in half diagonally to make a triangle. Serve immediately.
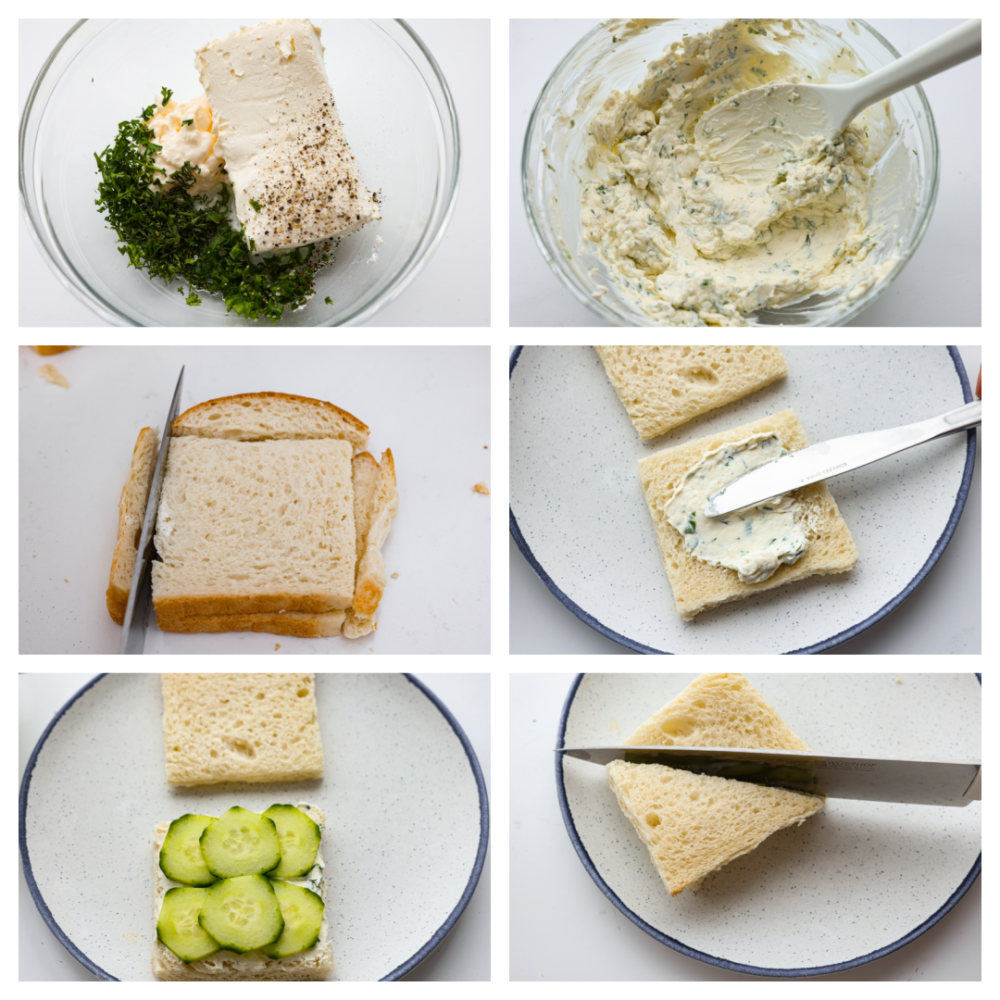
6-photo collage of cream cheese spread and sandwiches being prepared.

Tips for Making Successful Cucumber Sandwiches

While this recipe is super easy to make, there are a few things to keep in mind to take it to the next level! These are a few ways to perfect and customize this classic English dish.

  • Salt Cucumbers: Salting your cucumber slices can keep your sandwiches from becoming soggy. Cucumbers have a very high water content, and salt helps to remove excess moisture. This tip is especially important if you plan on making these sandwiches ahead of time! Transfer your sliced cucumbers to a large bowl and add a sprinkle of salt. After about 20 minutes, your cucumbers will be ready to use.
  • Flavor Cucumbers: A great way to add more pickle flavor is to toss your cucumber slices in white vinegar before adding them to your sliced bread.
  • Use a Sharp Knife: The key to uniform sandwich pieces with crisp edges is to use a sharp, serrated knife.
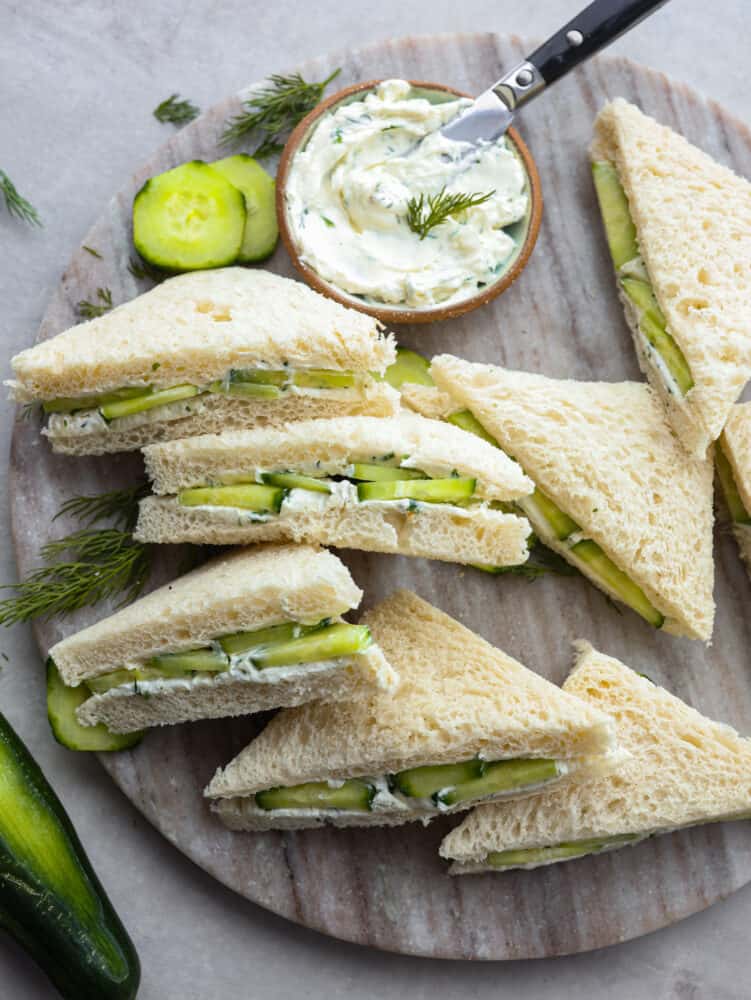
Top-down view of sliced cucumber sandwiches served with lemon dill spread.

Storing Leftovers

Store your leftover cucumber sandwiches for the perfect grab-and-go snack! They’re great for putting into school lunches as well.

  • In the Refrigerator: Leftover sandwiches will last for up to 4 days either covered in plastic wrap or in an airtight container.
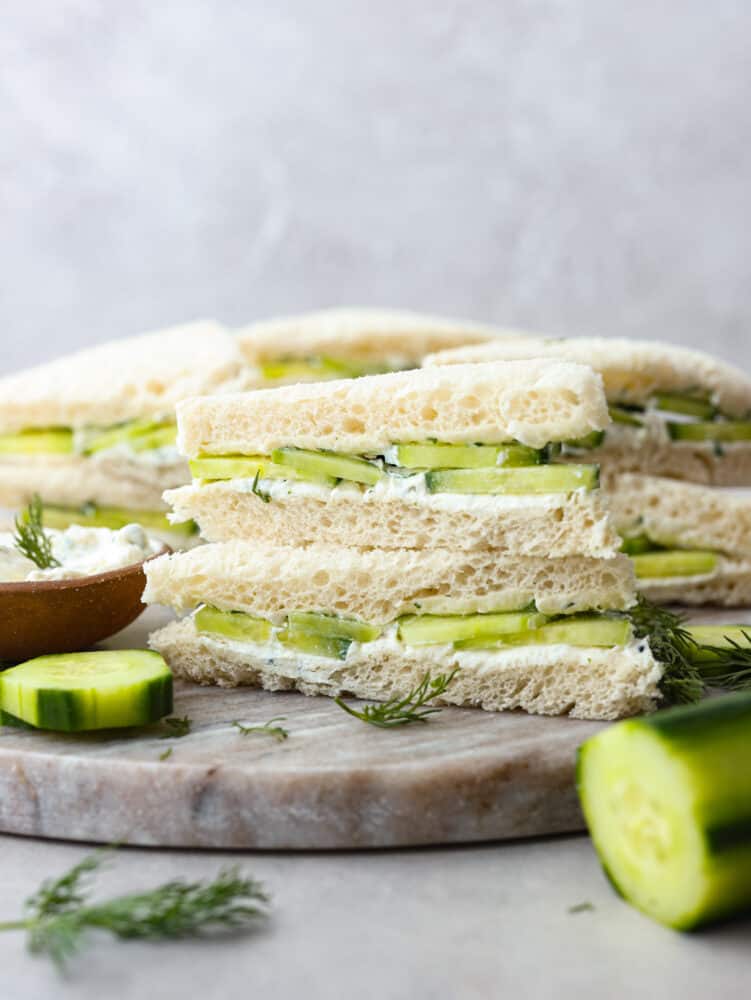
A stack of 2 cucumber sandwiches.
Print

Cucumber Sandwich

Cool and crisp, cucumber sandwiches are the perfect summer appetizer! Each sandwich is lined with a creamy lemon herb spread for a pop of zesty flavor.
Course Appetizer, lunch
Cuisine English
Keyword cucumber sandwich
Prep Time 5 minutes
Total Time 5 minutes
Servings 4
Calories 400kcal
Author Alyssa Rivers

Ingredients

  • 8 oz cream cheese softened
  • 2 tablespoons mayonnaise
  • 1 tablespoon lemon juice
  • 1 tablespoon chives or green onions chopped
  • 1 tablespoon dill chopped
  • 1 teaspoon parsley chopped
  • salt and pepper to taste
  • 2 cucumbers peeled and sliced
  • 8 slices of white bread crusts removed

Instructions

  • In a bowl add your cream cheese, mayonnaise, lemon juice, chives, dill, parsley, and salt and pepper and mix it all together.
  • Take two pieces of bread and spread the mixture on each one.
  • Layer your cucumber slices on top of one slice, and then put the pieces of bread together.
  • Cut it in half diagonally to make a triangle. Serve immediately.

Nutrition

Calories: 400kcal | Carbohydrates: 31g | Protein: 9g | Fat: 27g | Saturated Fat: 13g | Polyunsaturated Fat: 5g | Monounsaturated Fat: 7g | Trans Fat: 1g | Cholesterol: 60mg | Sodium: 464mg | Potassium: 348mg | Fiber: 2g | Sugar: 7g | Vitamin A: 900IU | Vitamin C: 7mg | Calcium: 184mg | Iron: 2mg


from The Recipe Critic https://ift.tt/WQbo8S9
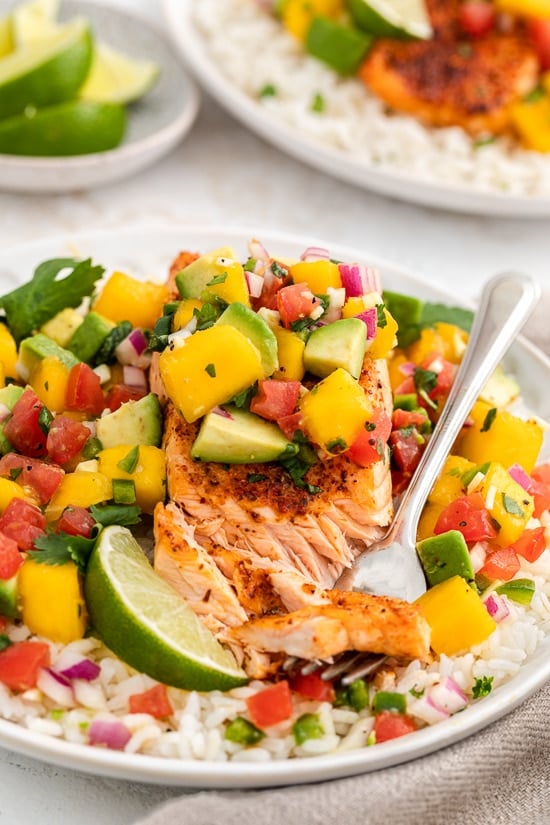
Chili-Lime Air Fryer Salmon

This Chili-Lime Air Fryer Salmon is seasoned with a blend of spices for maximum flavor that cooks in under 10 minutes.

Chili-Lime Salmon
Chili-Lime Air Fryer Salmon

The only way I make salmon these days is in the air fryer. It’s the fastest and easiest way to get the most tender piece of salmon with seared edges. Plus, there’s no need to preheat the oven, and it doesn’t make the whole kitchen smell like fish. This Chili-Lime Salmon is so tasty as is, or try it topped with Avocado Mango Salsa! You may also like this Air Fryer Salmon with Maple-Soy Glaze or Basil-Parmesan Crusted Salmon recipe.

(more…)

The post Chili-Lime Air Fryer Salmon appeared first on Skinnytaste.


from Skinnytaste https://ift.tt/uNk60AY

Pear Tart

This pear tart is as delicious as it is gorgeous! It has a perfectly flaky crust topped with sliced pears and covered with a delightful brown sugar crumb topping.

I love a good classic dessert like this pear tart that I can use for any occasion. Some more of my other favorites are this strawberry shortcake, this cheesecake and this delicious caramel apple slab pie.

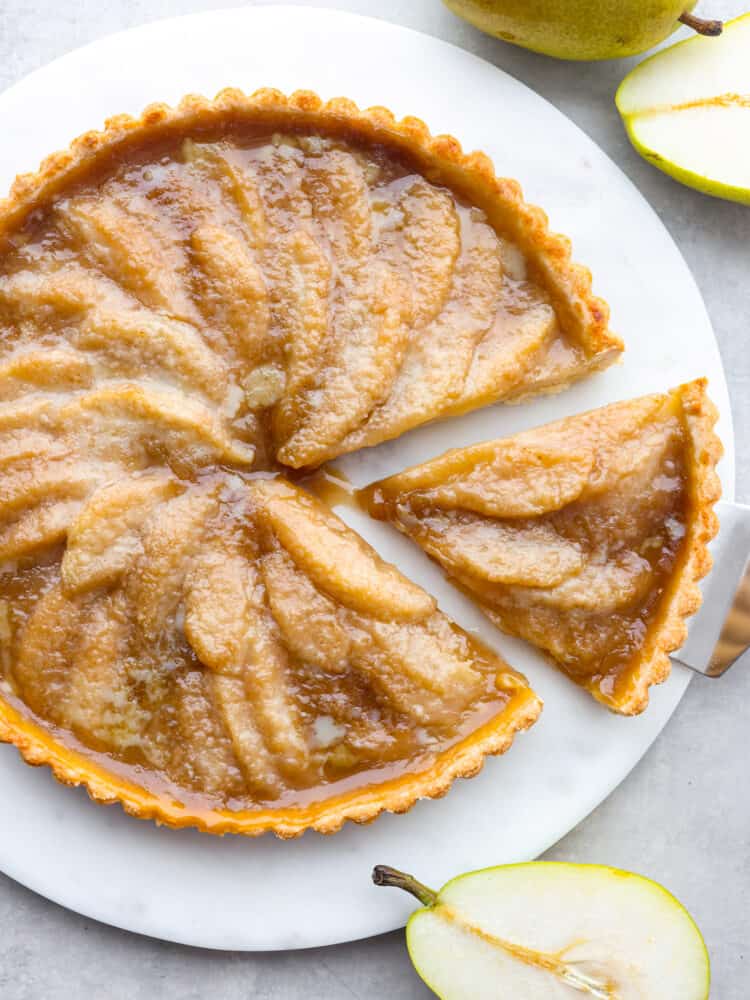
The top view of a pear tart with a slice being taken out with a pie server.

Pear Tart Recipe

This pear tart is so delicious that I don’t even know where to begin! Should I start by telling you about the heavenly crust that is buttery and flakey? Or perhaps we begin with the filling that is so good that I could eat it all by itself by the spoonful? Or the magic these two things make when you bake them together and get a caramelized topping to combine them all?

Dessert is taken seriously at our house, and this one never fails! This pear tart is delicious and will hit the spot and be the star of the show at any get-together. It comes together so easily too! So be sure to whip this recipe up to impress your guests. They will all be asking for the recipe by the end of the night! Serve this with some vanilla ice cream and they won’t be able to stop at one slice.

Ingredients to Make a Pear Tart

The ingredients that you need to make this pear tart are so simple! I bet that you already have them in your kitchen and pantry. Check out the recipe card at the bottom of the post for exact ingredient measurements.

Crust

  • Flour: All-purpose flour works great for this crust.
  • Granulated Sugar: The sugar adds a sweet element.
  • Salt: The salt will enhance all of the flavors of the other ingredients.
  • Butter: Make sure that the butter is unsalted and cold.
  • Egg Yolk: I always use large eggs when I am baking.
  • Cold Water: This will help bind all of the ingredinet in the crust together.

Filling

  • Large (moderately ripe) Pears: Core your pears and slice them into thin slices so they look even on this pear tart.
  • Lemon Juice: You can use fresh or bottled.
  • Cornstarch: This thickens up the filling.
  • Brown Sugar: The brown sugar makes the filling so good! Don’t skip it!
  • Ground Cinnamon: Add it a touch of cinnamon flavor and this filling will melt in your mouth.

Crumb Topping

  • Flour: All-purpose flour works perfect for this topping.
  • Brown Sugar: The brown sugar carmelizes after it cooks on top.
  • Butter: The butter MUST be cold for this topping to turn out for thie pear tart.

How to Make a Pear Tart

This pear tart recipe is simple to put together. Most of the time is spent with this in the oven, which means the hardest thing about it is just waiting for it to be done!

Crust

  1. Mix dry ingredients: In a medium bowl, mix the flour, sugar, and salt together. Using a fork or a pastry blender, cut the cold butter into the flour mixture and continue to cut it in until it begins to resemble breadcrumbs.
  2. Add in egg yolk and water: Add in the egg yolk and mix as best you can with a fork before adding 2 tbsp of the chilled water. Knead the dough together gently, adding more water if necessary to bring the dough together in a ball.
  3. Chill: Wrap the dough in plastic wrap and allow to chill in the fridge for 30 minutes and preheat the oven to 375° while it chills.
  4. Roll dough: Once chilled, roll the dough out into a ¼ inch thick circle. If the dough is cracking as you roll, give it a few minutes to warm up slightly before trying again. To transfer it to the tart pan, roll the pastry up on your rolling pin and unroll it over the tart pan.
  5. Press into pan: Press the bottom and sides into the pan. Trim the excess dough by rolling the rolling pin over the top of the tart pan. Prick the bottom of the pan a few times with a fork. Place in the fridge until the pears and topping are ready to assemble the pear tart.

Filling

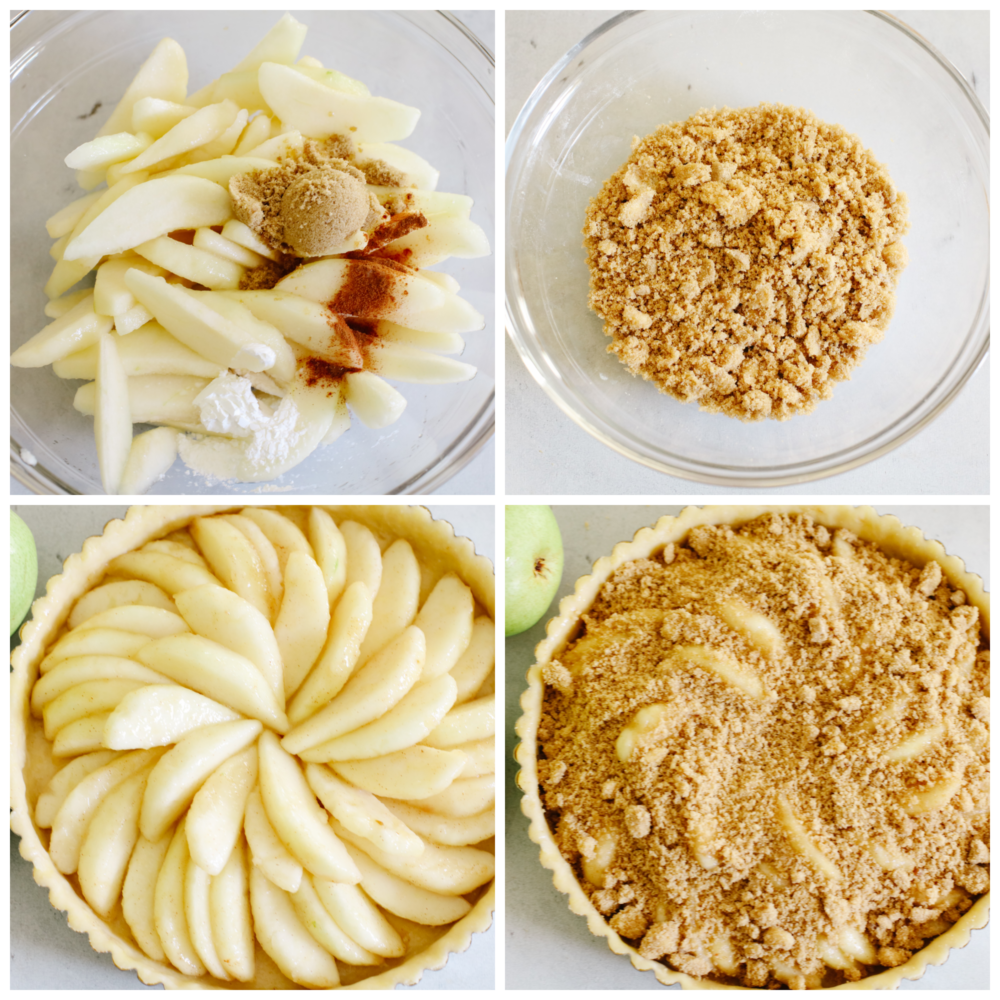
  1. Combine and toss: Add the sliced pears, lemon juice, cornstarch, brown sugar and cinnamon to a large bowl. Toss until combined. Set aside until the crumb topping is ready.

Crumb Topping

  1. Blend: In a medium bowl, add the flour, sugar, and butter. Blend together with either a pastry cutter or your fingers until it is nice and crumbly.

Assembly

  1. Arrange pears: Arrange the pears in the chilled crust and sprinkle the top with the crumb topping.
  2. Bake: Bake for 35-40 minutes, until the edges of the crust are golden brown, and the topping is lightly browned and slightly melted (like a glaze) into the pears.
  3. Cool: Let cool for 10-15 minutes before removing from the pear tart the tart pan and serving.
4 pictures showing how to make the crumb topping and assemle a pear tart.

Why do I need to use cold butter?

Using cold butter is a MUST when it comes to making a pear tart recipe (or any crust or pastry). You need cold butter because you don’t want the butter to melt as you are mixing it in. The cold butter helps create a barrier and air pockets that make it a flaky and delicious crust!

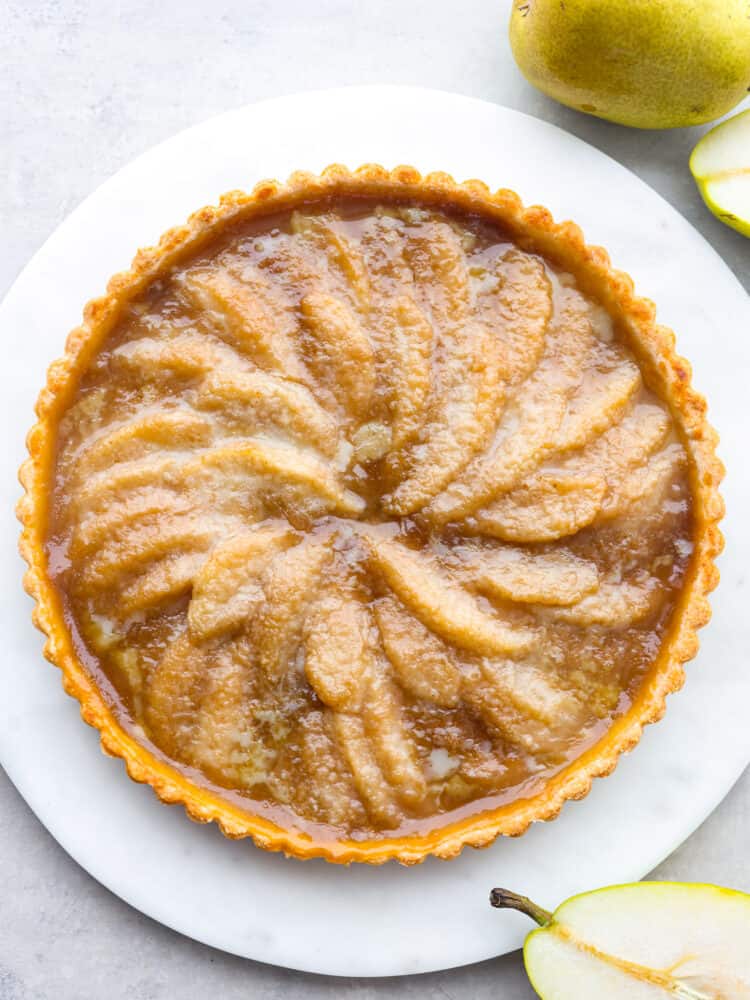
The top view of a pear tart on a white platter.

How to Store Leftover Pear Tart

If you have any pear tart leftover then it needs to be stored in your fridge. Covers it and it will last for about 1-2 days.

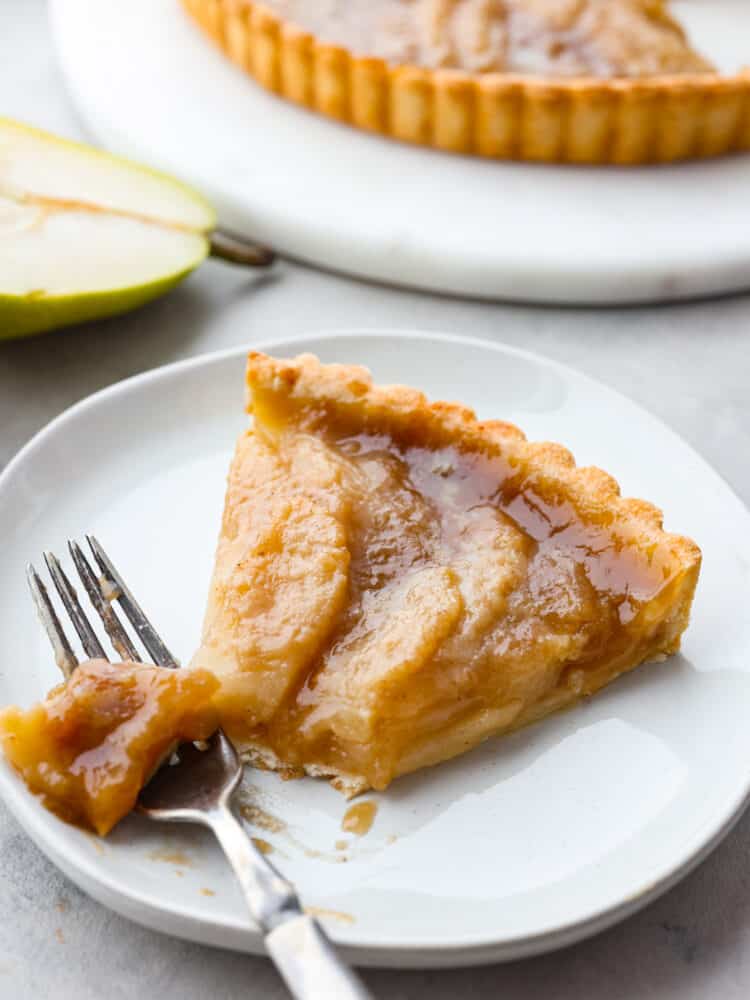
A slice of pear tart on a plate with a silver fork cutting a piece of it.
Print

Pear Tart

This pear tart is as delicious as it is gorgeous! It has a perfectly flaky crust topped with sliced pears and covered with a delightful brown sugar crumb topping. 
Course Dessert
Cuisine American
Keyword Pear Tart
Prep Time 30 minutes
Cook Time 40 minutes
Chill Time 30 minutes
Total Time 1 hour 40 minutes
Servings 8 Slices
Calories 280kcal
Author Alyssa Rivers

Ingredients

Crust

  • 1 ½ Cup Flour
  • ¼ Cup Granulated Sugar
  • ¼ Teaspoon Salt
  • ¼ Cup Unsalted Butter Cold
  • 1 Egg Yolk
  • 2-4 Tablespoons cold water as needed

Filling

  • 3-4 Large Pears (moderately ripe), cored and sliced
  • 1 Tablespoon Lemon Juice
  • 1 1/2 Tablespoon Cornstarch
  • 3 Tablespoons Brown Sugar
  • 1/8 Teaspoon Ground Cinnamon

Crumb Topping

  • 1 Tablespoon All Purpose Flour
  • 1/3 Cup Brown Sugar
  • 1 Tablespoons Butter Cold

Instructions

Crust

  • In a medium bowl, mix the flour, sugar, and salt together. Using a fork or a pastry blender, cut the cold butter into the flour mixture and continue to cut it in until it begins to resemble breadcrumbs.
  • Add in the egg yolk and mix as best you can with a fork before adding 2 tbsp of the chilled water. Knead the dough together gently, adding more water if necessary to bring the dough together in a ball.
  • Wrap the dough in plastic wrap and allow it to chill in the fridge for 30 minutes and preheat the oven to 375° while it chills.
  • Once chilled, roll the dough out into a ¼ inch thick circle. If the dough is cracking as you roll, give it a few minutes to warm up slightly before trying again. To transfer it to the tart pan, roll the pastry up on your rolling pin and unroll it over the tart pan.
  • Press the bottom and sides into the pan. Trim the excess dough by rolling the rolling pin over the top of the tart pan. Prick the bottom of the pan a few times with a fork. Place in the fridge until the pears and topping are ready.

Filling

  • Add the sliced pears, lemon juice, cornstarch, brown sugar, and cinnamon to a large bowl. Toss until combined. Set aside until the crumb topping is ready.

Crumb Topping

  • In a medium bowl, add the flour, sugar, and butter. Blend together with either a pastry cutter or your fingers until it is nice and crumbly.

Assembly

  • Arrange the pears in the chilled crust and top with the crumb topping.
  • Bake for 35-40 minutes, until the edges of the crust are golden brown, and the topping is lightly browned and slightly melted into the pears.
  • Let cool for 10-15 minutes before removing from the tart pan and serving.

Nutrition

Calories: 280kcal | Carbohydrates: 50g | Protein: 3g | Fat: 8g | Saturated Fat: 5g | Polyunsaturated Fat: 1g | Monounsaturated Fat: 2g | Trans Fat: 1g | Cholesterol: 43mg | Sodium: 91mg | Potassium: 129mg | Fiber: 3g | Sugar: 26g | Vitamin A: 270IU | Vitamin C: 4mg | Calcium: 27mg | Iron: 1mg


from The Recipe Critic https://ift.tt/kp5vQye

Monday, 30 May 2022

Disneyland Copycat Mickey Pretzels

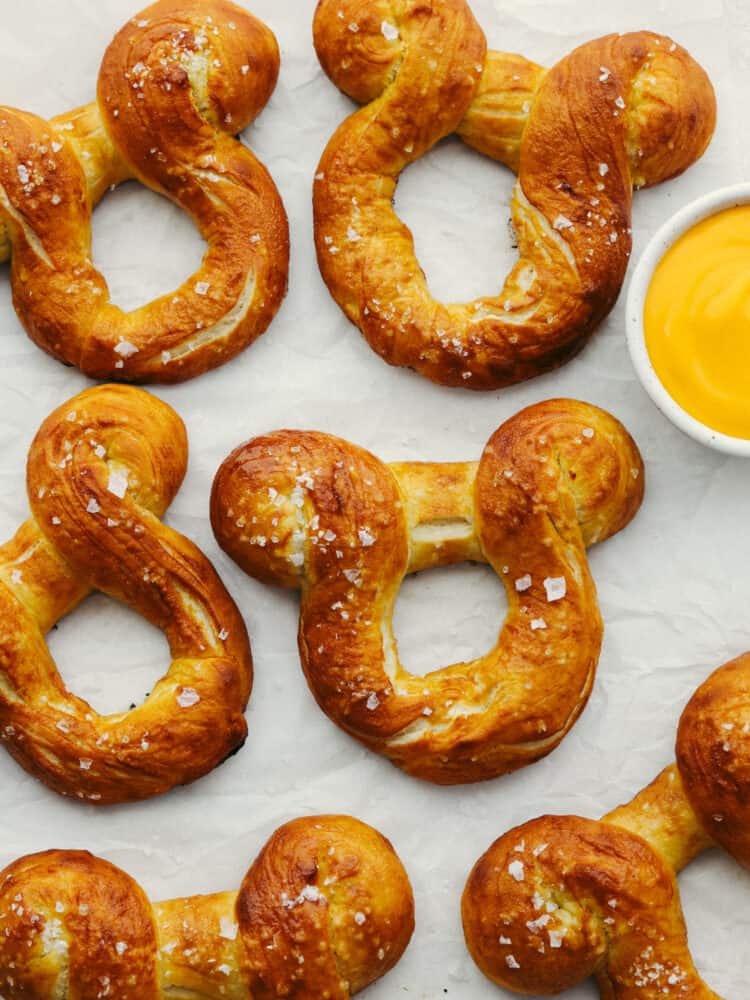
Disney fans, these Mickey pretzels are for you! They are golden brown on the outside, have a soft texture on the inside, and are topped with coarse salt. And, they are shaped like Mickey! A soft pretzel doesn’t get much better than that!

If you love the Happiest Place on Earth as much as I do, then you have to check out my other copycat recipes. My favorites are the Monte Cristo Sandwich (Disneyland Copycat), this amazing churro toffee, and then, of course, raspberry rose macaron!

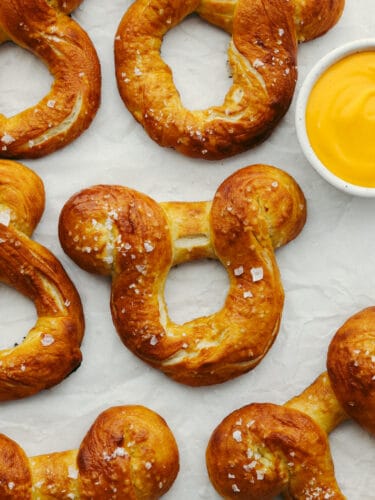
The top voew of cooked Mickey pretzels on parchement paper. There is a small bowl of cheese sauce on the side.

Mickey Pretzels

Soft pretzels are a weakness of mine! They are one of my favorite park snacks to get. I love them because they have the most delicious, savory flavor, and the coarse salt on the top is the best part! Or may dipping them in cheese sauce is the best part… That’s debatable. Anyways, these Mickey pretzels are no exception! They have a crispy, golden outside texture, and the inside is soft, chewy, and SO GOOD.

These pretzels can be found in Disneyland and Walt Disney World, and now… your home! They are a classic Disney snack that your entire family will ask for over and over again. And the great thing about making these at home is that you get more for your money and you don’t have to stand in a long line to get one! A little tip for switching these up, try dipping them in some softened cream cheese to have a little contrast between sweet and salty. It’s delicious!! And guess what, even if you aren’t a Disney fan, you can make these at home too. They are for everyone!

Ingredients to Make Disneyland’s Mickey Pretzels

The great thing about making these pretzels at home is that the ingredients are simple. In fact, you probably already have them all in your kitchen. Because these are so easy to make, they will become a go-to for your family! Check out the recipe card at the bottom of the post for exact measurements.

  • Warm Water: The warm water will be used to activate the yeast. Make sure that it’s not too hot or it will kill the yeast.
  • Active Dry Yeast: This makes the pretzels rise.
  • Granulated Sugar: A little bit of sugar gives these pretzels the perfect flavor.
  • Salt: This salt goes into the dough and will enhance all of the flavors in the recipe.
  • Butter: I use unsalted butter in this recipe.
  • Flour: All purpose flour works fantastic for these Mickey pretzels.
  • Oil: You will add the oil to the top of your rising dough.
  • Hot Water and Baking Soda: This mixture coats the dough and is what will give the outside that golden and crispy texture.
  • Butter: I like to use saleted butter for this part of the recipe.
  • Coarse Salt: Add this on top before you cook them and it will be the best part!
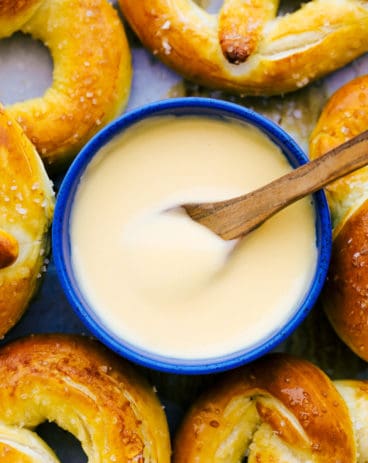
  • **Optional: Dip these in this delicious homemade cheese dip.

How to Make Homemade Mickey Pretzels

This recipe is straightforward and it can be made by even the most beginner bakers! Try these out and then make them with your kids. They will love shaping the dough into Mickey!

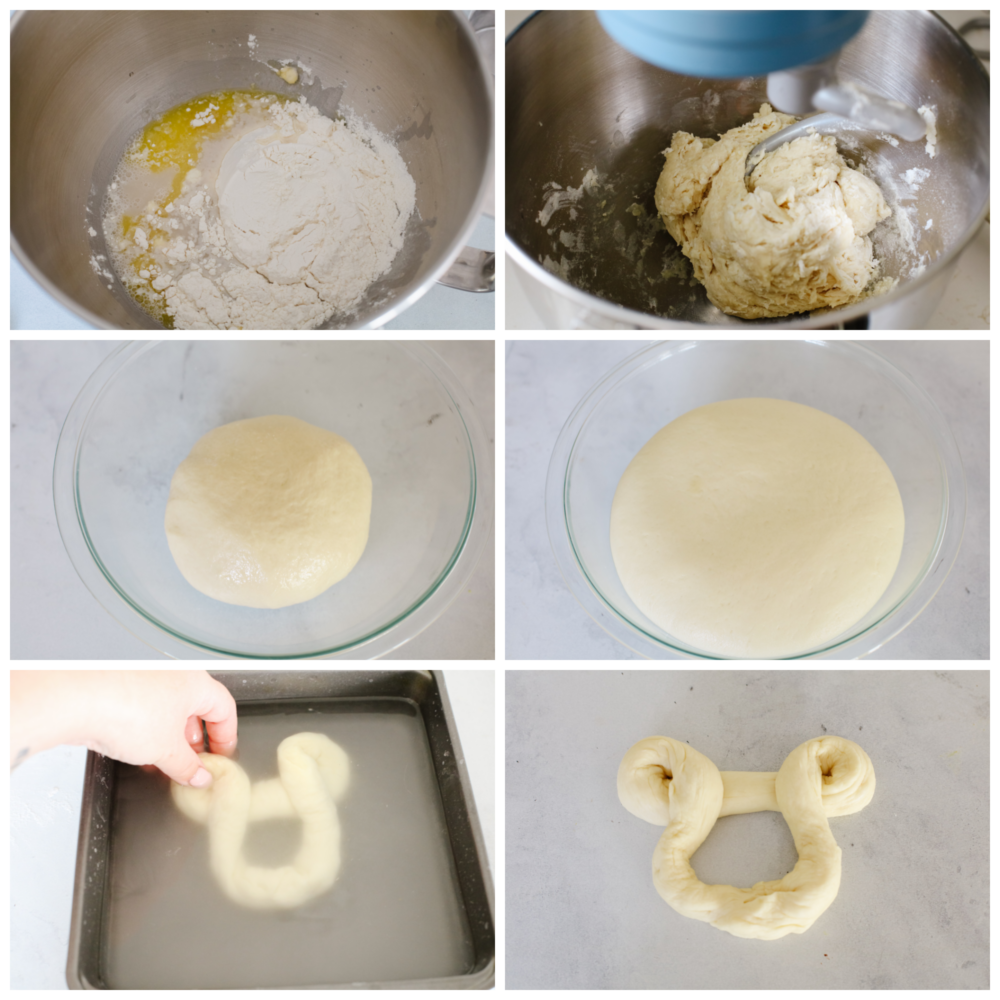
  1. Proof yeast: In a stand mixer add the warm water and yeast. Allow the yeast to bloom and then become bubbly, about 5 minutes.
  2. Make dough: With the dough hook attachment, add the sugar, salt, melted butter, and the flour 1 cup at a time. If the dough is too dry then add in 1 more tablespoon of water.
  3. Knead and let rise: Remove the dough from the bowl and knead into a ball. Place the dough into a large bowl and then add the oil on top. Cover and let rise until doubled in size, about an hour.
  4. Roll and shape: Preheat the oven to 450°F and line two baking sheets with parchment paper. Divide the dough into 6 equal pieces. Then, roll each piece into a long rope, pinching and rolling the two ends together to make a circle from the dough. Twist the dough into a Mickey Mouse head with the two ears and head.
  5. Dip into water/baking soda mixture: Add the hot water and baking soda in a medium sized bowl and then whisk to dissolve the baking soda. Dip each pretzel into the bowl and them place them on the prepared baking sheets. You may need to reshape them a little.
  6. Add butter and salt: Brush the pretzels with melted butter and sprinkle with coarse salt.
  7. Bake: Bake for 8-10 Minutes, until the tops of the Mickey pretzels are golden brown. Then serve with cheese dip.
6 pictures showing how to make the dough and form it into a Mickey shape.

Dips for Mickey Pretzels

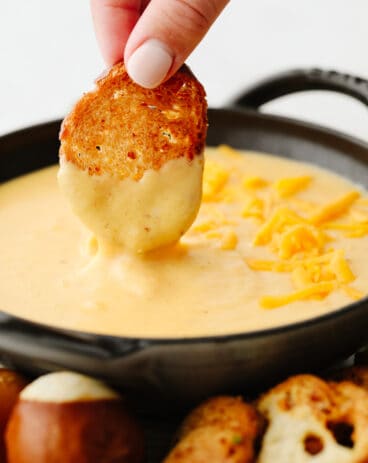
A soft pretzel isn’t complete without a delicious sauce to dip it in! Here are a few of my favorites that go so well with it, try them all out and let me know which on is your very favorite!

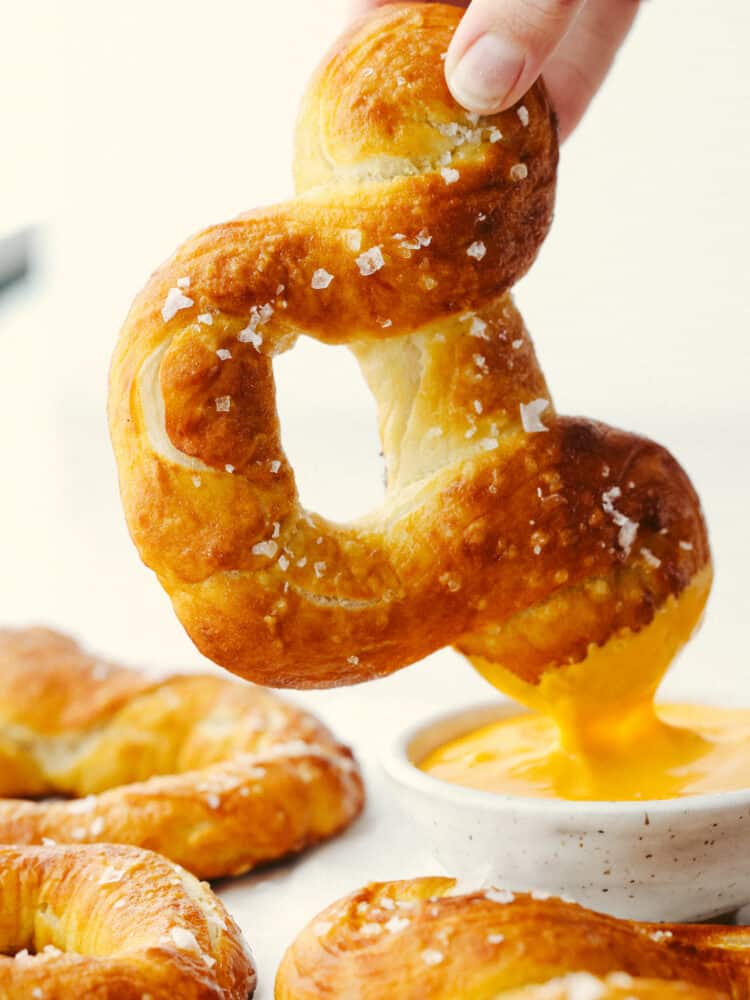
A Mickey pretzel being dipped into cheese sauce.

Variations

Switch these Mickey pretzels up by changing out the shape or the flavor. You can make them your own by adding different toppings or serving them with your favorite choice of dip.

  • Shape: Instead of twisting the dough into a mickey pretzel shape, you can make it like a classic pretzel or cut it into pretzel bites instead.
  • Change the Topping: Create an amazing dessert pretzel easily by leaving out the salt and brushing with butter and cinnamon sugar instead. Or add pepperoni in the last few minutes of baking for a pepperoni pretzel!
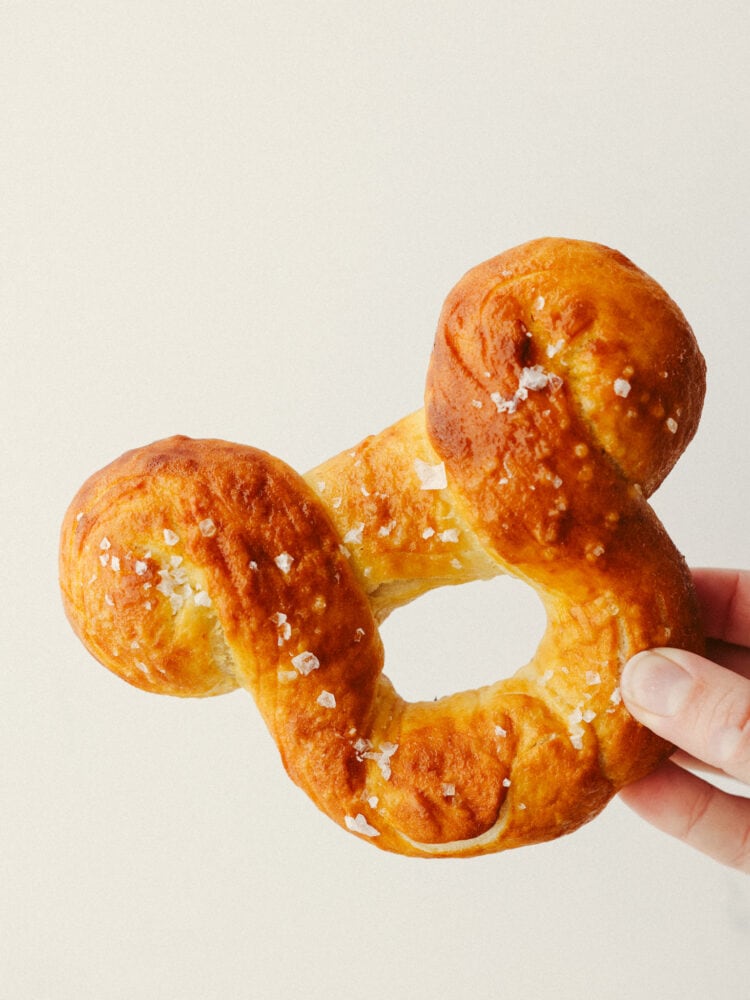
A closeup of a hand holding a Mickey pretzel.
Print

Disneyland Copycat Mickey Mouse Pretzel

Disney fans, these pretzels are for you! They are golden brown on the outside, have a soft texture on the inside, and are topped with coarse salt. And, they are shaped like Mickey. A soft pretzel doesn't get much better than that! 
Course Bread, Snack
Cuisine American
Keyword Disneyland Copycat Recipe, Mickey Pretzel
Prep Time 20 minutes
Cook Time 10 minutes
Total Time 30 minutes
Servings 6 Pretzels
Calories 362kcal
Author Alyssa Rivers

Ingredients

  • 1 Cup Warm Water
  • 2 ½ Teaspoons Active Dry Yeast
  • ½ Cup Granulated Sugar
  • 1 Teaspoon Salt
  • 1 Tablespoons Unsalted Butter Melted
  • 3 Cups All-Purpose Flour
  • 1 Tablespoon Oil
  • 2 Cups Hot Water
  • ¼ Cup Baking Soda
  • 1-2 Tablespoons Salted Butter Melted
  • Coarse Salt for Topping
  • Cheese Dip

Instructions

  • In a stand mixer add the warm water and yeast. Allow the yeast to bloom and become bubbly about 5 minutes.
  • With the dough hook attachment, add the sugar, salt, melted butter, and the flour 1 cup at a time. If the dough is too dry, add 1 more tablespoon of water.
  • Remove the dough from the bowl and knead it into a ball. Place the dough into a large bowl and add the oil on top. Cover and let rise until doubled in size, about an hour.
  • Preheat the oven to 450°F and line two baking sheets with parchment paper. Divide the dough into 6 equal pieces. Roll each piece into a long rope, pinching and rolling the two ends together to make a circle from the dough. Twist the dough into a Mickey Mouse head with the two ears and head.
  • Add the hot water and baking soda in a medium sized bowl and whisk to dissolve the baking soda. Dip each pretzel into the bowl and place on the prepared baking sheets. You may need to reshape them a little.
  • Brush the pretzels with melted butter and sprinkle with coarse salt.
  • Bake for 8-10 Minutes, until the tops are golden brown. Serve with cheese dip.

Nutrition

Calories: 362kcal | Carbohydrates: 66g | Protein: 9g | Fat: 7g | Saturated Fat: 3g | Polyunsaturated Fat: 1g | Monounsaturated Fat: 3g | Trans Fat: 1g | Cholesterol: 10mg | Sodium: 1781mg | Potassium: 116mg | Fiber: 3g | Sugar: 17g | Vitamin A: 117IU | Vitamin C: 1mg | Calcium: 16mg | Iron: 3mg


from The Recipe Critic https://ift.tt/LvocXZG