Friday 31 December 2021

Classic Greek Spanakopita

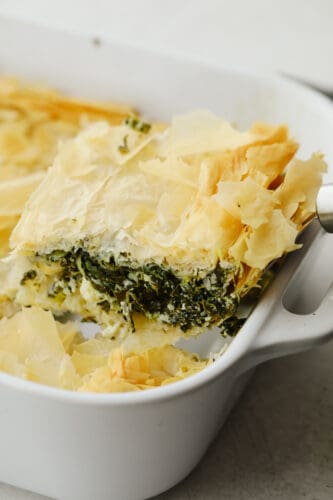
Spanakopita has a perfectly crisp and flakey outside with a delicious and comforting cheesy, spinach filling. It’s a classic and savory Greek pie that is a dish that the entire family will love!

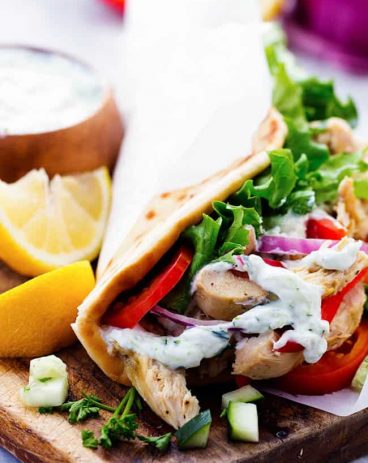
You can cook this as a side dish or as an entree. But either way, serve it up with some Greek salad, chicken, and baklava and you will have yourself a Greek meal for the books!

A slice of spanakopita on a plate.

What is Spanakopita?

Ok, I know that the name sounds fancy and intimidating but this recipe is NOT that! Spanakopita is a Greek dish! A savory and creamy spinach pie if you will. It is made with fillo dough which is thin, layered sheets of dough that resemble the texture of tissue paper. It gives this pie the BEST texture and the flakes melt in your mouth when you take a bite!

The filling on this dish is made with Greek yogurt, feta cheese, and an array of delicious spices! You mix it all up together to make a creamy filling that you then cook in your fillo crust. Once this has been baked then you serve it up and you can eat it warm or chilled! That makes this recipe perfect for leftovers because it tastes just as good the next day! It goes so well with this hummus and chicken!

Ingredients in Spanakopita

The ingredients to this are actually pretty simple! Gather them up and hurry and make this. It’s not a recipe that you want to miss out on!

  • Frozen spinach: Make sure that your spinach is thawed and well drained.
  • Flat-leaf parsley, Chives and Dill:  Chop these all up finely.
  • Garlic cloves: If you don’t have any fresh garlic cloves on hand then you can use minced garlic. ½ tsp equals about 1 clove of garlic.
  • Green onions: These not only bring in a beautiful color to go with the spinach but the flavor they add is so good!
  • Lemon juice: You can use fresh lemon juice or from a bottle.
  • Extra virgin olive oil: This keeps the recipe light.
  • Eggs: The eggs bind all of the ingredients together.
  • Feta cheese: Don’t try and substitute this for another cheese. The feta is classic to this dish.
  • Greek yogurt: I love how this adds a creamy texture.
  • Salt and Pepper: These wil season it all up!
  • Fillo dough: Your dough should be fully thawed before baking this spanakopita.
  • Butter: I used unsalted butter in this recipe.

Let’s Make Some Spanakopita!

Get out your ingredients because it’s time to make some spanakopita! You are going to love this dish. It is quick and easy and something unique to add to any meal!

  1. Preheat oven: Preheat the oven to 325°
  2. Combine spinach and spices: In a large bowl, combine the well drained spinach (I squeeze it in a sieve and then in some paper towels to get all the excess water out), parsley, dill, chives, garlic, and green onions together.
  3. Add the rest of the ingredients: Add the lemon juice, olive oil, eggs, feta cheese, Greek yogurt, salt and pepper. Stir until thoroughly combined.
  4. Prepare fillo dough: Brush the bottom and sides of a 9×13 pan with melted butter and add two sheets of fillo dough. Overlap it so the bottom and sides of the pan are covered. Continue to brush the layers with butter, adding more fillo dough until you have about 12-15 layers of dough.
  5. Add the filling, top with fillo sheets and bake: Spread the filling evenly in the pan and add 2 sheets of fillo dough on top and brush with butter. Repeat with the remaining sheets, about 12-15, layering 2 sheets at a time and brushing with butter. Try to save 2 sheets that have not ripped for the top layer. Brush with butter and bake for 50-60 minutes, until the fillo dough is golden brown. Serve warm or chilled.
4 pictures showing how to make the filling and brush on oil onto fill dough.

Working with Fillo Dough

Because using fillo dough to make this spanakopita can be tricky, I have some tips to help you work with it so that it doesn’t break. But first, know that a couple of the pieces are going to break and tear and that’s ok! Just make sure that you have a few pieces left that are intact for the top.

  • Thaw it! Remember to thaw your dough in the fridge about a day before you need to use it. If it’s not thawed then you won’t be able to get all of the layers that you need out of it.
  • How to keep the fillo dough plyable: Before you start using the dough, get two slightly damp kitchen towels and put the dough between the two. This will keep the dough from breaking.
  • Use the oil: The extra virgin olive oil not only keeps the recipe lighter but it helps your fillo dough. You don’t want to use too much oil but using this to brish on between the layers helps them stick together and not tear.
A slice of spanakopita in a dish being served.

How to Store Leftovers

Leftover spanakopita is delicious the next day because you can eat it warm or cold! Here is how you can store your extra for later.

  • Refrigerator: Once your spanakopita has cooled then place it in an airtight container in your fridge. It will last about 3 days.
  • Reheat: You can reheat this in the oven at 325 degrees for about 15 minutes or until heated through.
Slices of spanakopita on a dish being dished up.
Print

Spanakopita

Spanakopita has a perfectly crisp and flakey outside with a delicious and comforting spinach filling. It's a classic and savory Greek pie that is a dish that the entire family will love! 
Course Dessert
Cuisine Greek
Keyword spanakopita
Prep Time 45 minutes
Cook Time 1 hour
Total Time 1 hour 45 minutes
Servings 12 People
Calories 230kcal
Author Alyssa Rivers

Ingredients

Filling

  • 16 ounces Frozen Spinach thawed and well drained
  • 1 cup Flat-leaf parsley chopped
  • 2 Tablespoons fresh chives chopped finely
  • 2 Tablespoons fresh dill chopped
  • 3 cloves garlic minced
  • 4 green onions chopped finely
  • ½ Tablespoon lemon juice
  • 2 Tablespoons robust extra virgin olive oil
  • 2 large eggs
  • 10 ounces feta cheese
  • ½ cup plain greek yogurt
  • ½ Teaspoon Salt
  • ¼ Teaspoon Pepper

Crust

  • 1 16- oz package of Fillo dough thawed
  • 8 Ounces Butter melted

Instructions

  • Preheat the oven to 325°
  • In a large bowl, combine the well-drained spinach (I squeeze it in a sieve and then in some paper towels to get all the excess water out), parsley, dill, chives, garlic, and green onions together.
  • Add the lemon juice, olive oil, eggs, feta cheese, Greek yogurt, salt, and pepper. Stir until thoroughly combined.
  • Brush the bottom and sides of a 9×13 pan with melted butter and add two sheets of fillo dough, overlapping so the bottom and sides of the pan are covered. Continue to brush the layers with butter, adding more fillo dough until you have about 12-15 layers of dough.
  • Spread the filling evenly in the pan and add 2 sheets of fillo dough on top and brush with butter. Repeat with the remaining sheets, about 12-15, layering 2 sheets at a time and brushing with butter. Try to save 2 sheets that have not ripped for the top layer. Brush with butter and bake for 50-60 minutes, until the fillo dough is golden brown. Serve warm or chilled.

Nutrition

Calories: 230kcal | Carbohydrates: 4g | Protein: 7g | Fat: 21g | Saturated Fat: 14g | Polyunsaturated Fat: 1g | Monounsaturated Fat: 5g | Trans Fat: 1g | Cholesterol: 93mg | Sodium: 542mg | Potassium: 218mg | Fiber: 1g | Sugar: 2g | Vitamin A: 5538IU | Vitamin C: 10mg | Calcium: 196mg | Iron: 1mg


from The Recipe Critic https://ift.tt/32zyHai

7 Day Healthy Meal Plan (Jan 3-9)

A free 7-day, flexible weight loss meal plan including breakfast, lunch and dinner and a shopping list. Recipes include macros and links to WW recipe builder to get your personal points.

7 Day Healthy Meal Plan

Cheers to 2022! I wish a happy and healthy year to you all! In this weeks meal plan you will notice a few favorites that made the Top 25 Most Popular Skinnytaste Recipes for 2021. Did your favorite make it? If not tell me what yours was! And don’t forget to check out Relish +, where you have the ability to adjust serving sizes for these meal plans for larger or smaller groups.

(more…)

The post 7 Day Healthy Meal Plan (Jan 3-9) appeared first on Skinnytaste.


from Skinnytaste https://ift.tt/3HnUznF

Everything Bagel Dip

This creamy everything bagel dip is THE BEST dip out there! Bring it as an appetizer that everyone will enjoy and it will fly off of the table.

If you love homemade dips then you should definitely try this chicken alfredo, hot corn, or this spinach artichoke dip. They are so good and are perfect for parties and get-togethers!

A platter with veggies and bread and a bowl of everything bagel dip.

Everything Bagel Dip

If you aren’t familiar with the Everything Bagel seasoning from Trader Joe’s then you MUST try it! Go and grab yourself some and become part of the following because it’s that good. It goes with everything and has the perfect mixture of seasonings to make whatever you put it in full of flavor. The only thing that could make it better is if it came in a dip form. And that’s where I come in!

This everything bagel dip is just about perfect. It takes less than 5 minutes to make and it only uses 4 ingredients. It doesn’t get much better than that! Once you’ve made this delicious dip then you can add it to a platter with some veggies like carrots, broccoli, or celery. Or you can use it in my favorite way by dipping a crostini, french baguette, or delicious sourdough bread in it. It’s SOO GOOD, you’ve got to try it!

Ingredients in Everything Bagel Dip

This recipe only uses 4 ingredients. It’s so good to eat that you may even want to double the recipe… You’ll be so glad that you did! See the recipe card at the bottom of the post for exact measurements.

  • Cream cheese: Make sure that your cream cheese is at room temperature before you start. It will mix in so much better.
  • Plain Greek yogurt: I like to use non-fat Greek yogurt. You can also use sour cream!
  • Everything Bagel Seasoning: You can get this at Trader Joe’s! Use a bit more if you love the flavor.  
  • Onion powder: This complements the other flavors perfectly.

Let’s Make Some Dip!

Gather up your ingredients and you will be enjoying this everything bagel dip in less than 5 minutes. And once you start eating this, you won’t be able to stop!

  1. Add ingredients to bowl: In a medium sized mixing bowl, add the cream cheese, greek yogurt, and onion powder.
  2. Beat to combine: Beat together using a hand mixer until well combined.
  3. Serve: To serve, transfer dip to a clean serving bowl. Sprinkle additional everything bagel seasoning on top. Serve with crackers and veggies of your choice!
2 pictures showing ingredients added to the bowl and the next picture showing them all mixed up.

What to Serve With It

Everything bagel dip is my favorite savory dip because it goes with just about everything! Here are a few ideas on what I like to eat it with. Make up a few platters and this dip will be the hit of any party!

  • Grape tomatoes
  • Celery
  • Carrots
  • Ritz Crackers
  • Wheat Thins
  • Cucumbers
  • Baguette
  • Broccoli
  • Cauliflower
  • Sugar snap peas
Bread being dipped into everything bagel dip.

How to Store Leftovers

If you are lucky enough to have leftovers of this delicious everything bagel dip then just place it in an airtight container and put it in your fridge. It will last 3-4 days. Enjoy!

Print

Everything Bagel Dip

This creamy everything bagel dip is THE BEST dip out there! Bring it as an appetizer that everyone will enjoy and it will fly off of the table! 
Course Appetizer
Cuisine American
Keyword everything bagel dip
Prep Time 5 minutes
Total Time 5 minutes
Servings 8 people
Calories 112kcal
Author Alyssa Rivers

Ingredients

  • 8 ounces cream cheese, room temperature
  • 1 cup non-fat plain Greek yogurt (or sour cream)
  • 3 Tablespoon Everything bagel seasoning (or more to taste)
  • 1/4 teaspoon onion powder

Instructions

  • In a medium-sized mixing bowl, add the cream cheese, greek yogurt, and onion powder.
  • Beat together using a hand mixer until well combined.
  • To serve, transfer dip to a clean serving bowl. Sprinkle additional everything bagel seasoning on top. Serve with crackers and veggies of your choice!

Notes

  • Dipping ideas– pita chips, pretzel thins, cucumbers, carrots, celery, grape tomatoes, baguette sliced, crackers.
  • I used melba toast in the picture.
 

Nutrition

Calories: 112kcal | Carbohydrates: 2g | Protein: 4g | Fat: 10g | Saturated Fat: 5g | Polyunsaturated Fat: 1g | Monounsaturated Fat: 2g | Trans Fat: 1g | Cholesterol: 32mg | Sodium: 396mg | Potassium: 75mg | Fiber: 1g | Sugar: 2g | Vitamin A: 382IU | Vitamin C: 1mg | Calcium: 56mg | Iron: 1mg


from The Recipe Critic https://ift.tt/3qDn6yL

Thursday 30 December 2021

Easy Homemade Hot Chocolate

This easy homemade hot chocolate is the perfect treat to end your year with! It’s so rich and creamy, you won’t want it any other way!

Looking for more amazing holiday drinks? You’ve got to try white chocolate, pumpkin pie, and cookies, and cream hot chocolate recipes!

Hot chocolate in a large pot being scooped up with a ladle.

Classic Hot Chocolate Recipe

The weather has been so cold in Utah! We even had a snow squall a few days ago. I had no idea what a ‘squall’ even was! It has been blistering cold and windy which makes making homemade hot chocolate a no-brainer. There’s nothing better than coming home and relaxing with a warm cup of chocolatey goodness. I like my hot chocolate to err on the side of milky and creamy. I’m not the biggest fan of overpowering chocolate flavor, but the great thing about this recipe is you can adjust to taste!

In this recipe, I use a mix of milk, sugar, vanilla, cocoa powder, and milk chocolate chips. It’s nice and simple! If you’re looking for a deeper chocolate flavor, you can swap out the milk chocolate chips for dark chocolate! No matter what kind of chocolate you use, you’re going to love how rich and creamy this recipe is. It’s a holiday staple for sure! You can even top your hot chocolate off with homemade marshmallows for more mouthwatering flavor! It’s the perfect combination to get you through these lower temperatures.

Ingredients for Homemade Hot Chocolate

5 super simple ingredients are all you need to make the best hot chocolate ever! This recipe is easy to customize, so I’ve got you covered on substitutes you can use as well! All measurements can be found in the recipe card at the end of the post.

  • Milk: Use your favorite kind here! 2%, whole, half & half, almond, soy, any milk or nut milk works. Just keep in mind that the higher the fat content is, the creamier your homemade hot chocolate will be.
  • Cocoa Powder: I like using Dutch process hot cocoa for a smoother chocolate flavor.
  • Granulated Sugar: A little white sugar is all you need to sweeten up your hot chocolate!
  • Milk Chocolate Chips: I add milk chocolate chips because I love the creaminess they add, but feel free to swap these out for dark or white chocolate chips instead.
  • Vanilla Extract: Vanilla helps to give your hot chocolate more delicious flavor. It’s subtle, but makes all the difference in how it tastes!

Making Your Hot Chocolate

Making hot chocolate from scratch is just as easy as making it from a premade mix! The only difference is, homemade hot chocolate is a million times more creamy and indulgent! Your family is going to go crazy over it this winter.

  1. Combine Ingredients: In a medium saucepan over medium high heat, combine the milk, cocoa powder, granulated sugar, and milk chocolate chips. Whisk to combine.
  2. Whisk: As the mixture heats up, continue to whisk until the chocolate chips melt. Heat for about 5 minutes, or until it reaches a desired temperature.
  3. Add Vanilla and Toppings: Remove from heat, and whisk in the vanilla. Serve immediately, and top with your favorite hot chocolate toppings!
A cup of hot chocolate with 2 marshmallows on top.

Tips and Variations

Toppings and flavor additions are what make hot chocolate great! Here are some of my favorite tips to help you make that perfect cup of creamy goodness. You’ll love how your homemade hot chocolate turns out!

  • Syrups: For double-chocolate, add a little homemade chocolate sauce to your drink. You can also add salted caramel sauce for some sweet and savory flavor!
  • Make it Minty: For mint hot chocolate, add a little peppermint extract or even melt down Andes chocolates into your batch.
  • Spices: For a flavor fit for the holidays, add in a little pumpkin pie spice to your hot chocolate! The cinnamon, nutmeg, and ginger gives it a cookie-like flavor. You can also add cinnamon and a pinch of cayenne for Mexican hot chocolate!

Storing Leftover Hot Chocolate

Now that you’ve made the best batch of homemade hot chocolate, here’s how to store and enjoy it later!

  • In the Refrigerator: Once your hot chocolate has cooled, you can keep it in the fridge for 3-4 days.
  • Reheating: I recommend reheating your hot chocolate over the stove since you have a little more control over the temperature than if it’s in the microwave. Only heat it until it’s warmed through- don’t let it boil! You don’t want your milk to burn.
Holding a white mug filled with hot chocolate and marshmallows.
Print

Easy Homemade Hot Chocolate

This easy homemade hot chocolate is the perfect treat to end your year with! It's so rich and creamy, you won't want it any other way!
Course Beverage
Cuisine American
Keyword homemade hot chocolate, hot chocolate
Prep Time 3 minutes
Cook Time 5 minutes
Total Time 8 minutes
Servings 4 people
Calories 344kcal
Author Alyssa Rivers

Ingredients

  • 4 cups milk (2%, whole, half & half) (any milk works, higher the fat makes it creamier)
  • 1/4 cup cocoa powder
  • 1/3 cup granulated sugar
  • 1/2 cup milk chocolate chips
  • 2 teaspoons vanilla extract

Instructions

  • In a medium saucepan over medium-high heat, combine the milk, cocoa powder, granulated sugar, and milk chocolate chips. Whisk to combine.
  • As the mixture heats up, continue to whisk until the chocolate chips melt. Heat for about 5 minutes, or until it reaches the desired temperature.
  • Remove from heat, and whisk in the vanilla. Serve immediately, and top with your favorite hot chocolate toppings!

Nutrition

Calories: 344kcal | Carbohydrates: 47g | Protein: 10g | Fat: 14g | Saturated Fat: 8g | Polyunsaturated Fat: 1g | Monounsaturated Fat: 2g | Trans Fat: 1g | Cholesterol: 28mg | Sodium: 122mg | Potassium: 407mg | Fiber: 2g | Sugar: 43g | Vitamin A: 446IU | Vitamin C: 1mg | Calcium: 309mg | Iron: 1mg


from The Recipe Critic https://ift.tt/3JsDqLj

Skinnytaste and Home Chef Meal Kit Partnership

I am so excited to announce I am partnering up with Home Chef again to put Skinnytaste recipes back on the Home Chef menu for a limited time only for the month of January.

Skinnytaste Home Chef January
Skinnytaste and Home Chef Meal Kits

We had such great feedback from our last partnership, most of you asking for more Skinnytaste meals on the menu. So this time around, we are offering even more familiar favorites plus all new delicious, better-for-you meal kits with 3 Skinnytaste recipes per week available to order online and delivered right to your door. This is for a limited time, only the month of January! Pre-order your Skinnytaste Home Chef meals before 1pm ET December 31 to get your the first week’s meal and $90 off your order which will arrive the week of 1/3. That’s 10 free meals!

Two meals will run concurrently with e-commerce options throughout the month of January in all Kroger stores across the country: Chicken Parmesan and the Latin-Style Steak with Onions and Tomatoes. Here’s a map of Kroger stores with corresponding chains.

Skinnytaste Home Chef Meal Kits

Week 1 (Jan 3)

  • Mahi-Mahi Florentine with Herb-roasted Fingerling Potatoes
  • Jumbo Turkey Meatball Bake with Broccoli and Peppers
  • Chicken with Mushroom-Shallot Sauce and Wild Rice

Week 2 (Jan 10)

  • Latin-Style Steak with Onions and Tomatoes
  • Baked Chicken Parmesan with Green Beans
  • Butternut Squash and Black Bean Enchiladas

Week 3 (Jan 17)

  • Shrimp Scampi with Broccoli Orzo
  • Sesame Tofu Rice Bowls with Broccoli
  • Gochujang-Glazed Salmon with Cauliflower Rice and Bok Choy

Week 4 (Jan 24)

  • Basil Parmesan Crusted Salmon with Salad
  • Peruvian Inspired Steak and Potatoes with Lomo Saltado Sauce
  • Crispy Chicken Schnitzel Dinner with Green Beans and Potatoes

Gina cooking in her kitchenskinnytaste home chef meal kit

Pre-order your Skinnytaste Home Chef meals before 1pm ET December 31 to get your the first week’s meal and $90 off your order which will arrive the week of 1/3. That’s 10 free meals!


The post Skinnytaste and Home Chef Meal Kit Partnership appeared first on Skinnytaste.


from Skinnytaste https://ift.tt/3HlULDU